Fortinet: using Let's Encrypt to automatically generate SSL certificates
A guide to configuring Let's Encrypt on FortiGate via ACME to automatically generate and renew public SSL certificates.
Last updated on
FortiGate firewalls, like all high-end enterprise solutions, have a significant cost, tied to the continuous development of the solution and to the ongoing improvements introduced release after release.
A general principle, which should be applied to all technologies, would be to use them to 100%, of course adapting them to our infrastructure context.
It is absolutely unthinkable to pay for an object — especially a security appliance — and not make the most of it, particularly if the features we enable are free and included in the solution. With this in mind, the need arises to govern the certificates of the services exposed by the FortiGate with valid public SSL certificates, so as to protect and encrypt traffic to the SSL VPN or to the firewall’s web access, for example.
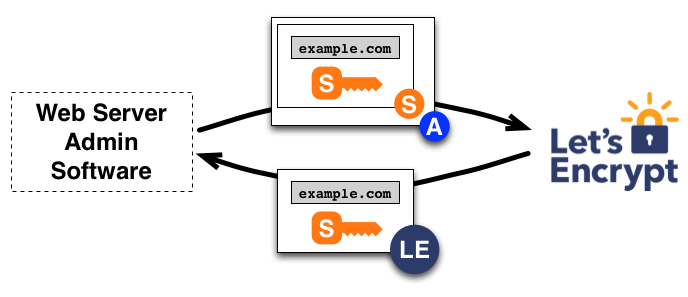
From version 7.0 of FortiOS it is possible to generate digital certificates via Let’s Encrypt directly from the FortiGate firewall through the ACME protocol, which also allows the certificate to be auto-renewed at expiration without our intervention.
Figure 1: Requesting a digital certificate from Let’s Encrypt via the ACME protocol
Requirements
To perform the proposed configuration you will need the following:
-
FortiGate firewall: the proposed configuration is possible on any FortiGate firewall with software release 7.0 and later (in this guide a FortiGate 60F updated to version 7.0.15 was used).
-
The FortiGate must have a public IP associated.
-
The ACME interface must be publicly exposed so that it can receive ACME update requests. It must not have VIPs or port forwarding on port 80 (HTTP) or 443 (HTTPS).
-
The Subject Alternative Name field is automatically filled in with the DNS host name of the FortiGate. It cannot be modified, it is not possible to use Wildcard certificates, and it is not possible to add multi-SAN certificates.
Configuring the ACME interface
The first step to follow is configuring the ACME protocol, responsible for obtaining and automatically renewing SSL certificates via Let’s Encrypt.
Once you have logged in to the FortiGate, click “System” in the left-hand column:
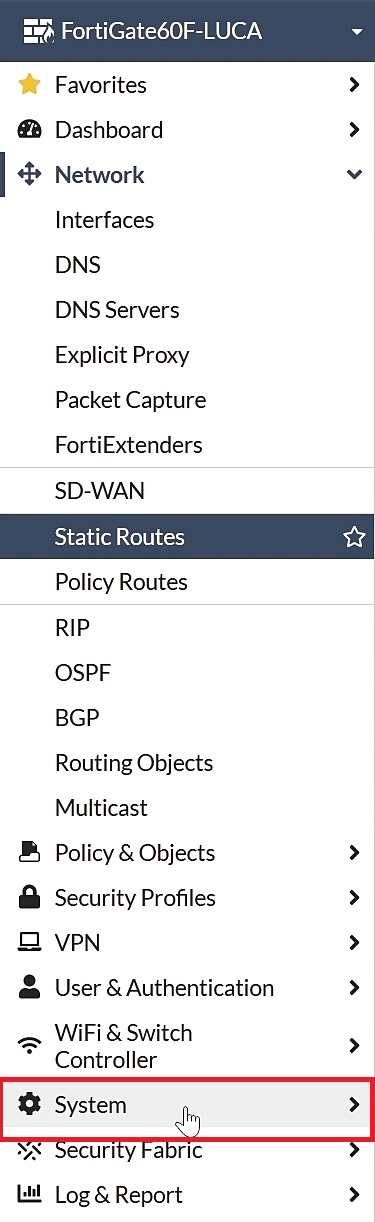
Figure 2: Click “System”
In the drop-down menu that opens, click “Settings” to change the system settings:
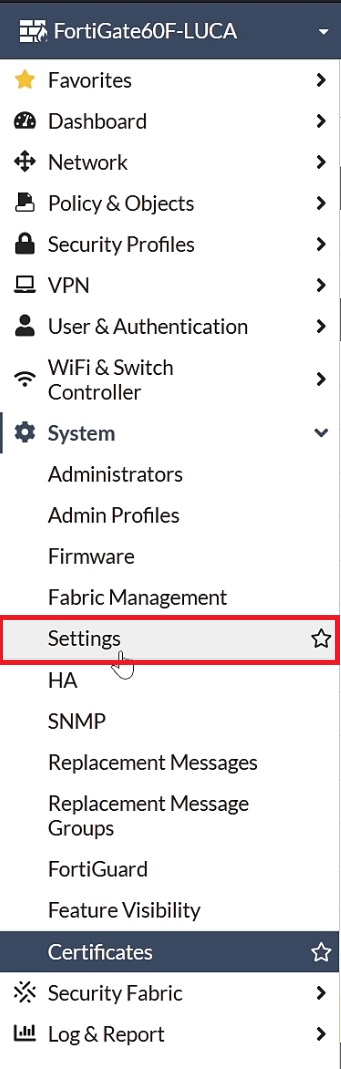
Figure 3: Click “Settings”
Once on the “System Settings” page, add your exposed interface, in my case “wan1”, and confirm the changes by clicking “Apply”:
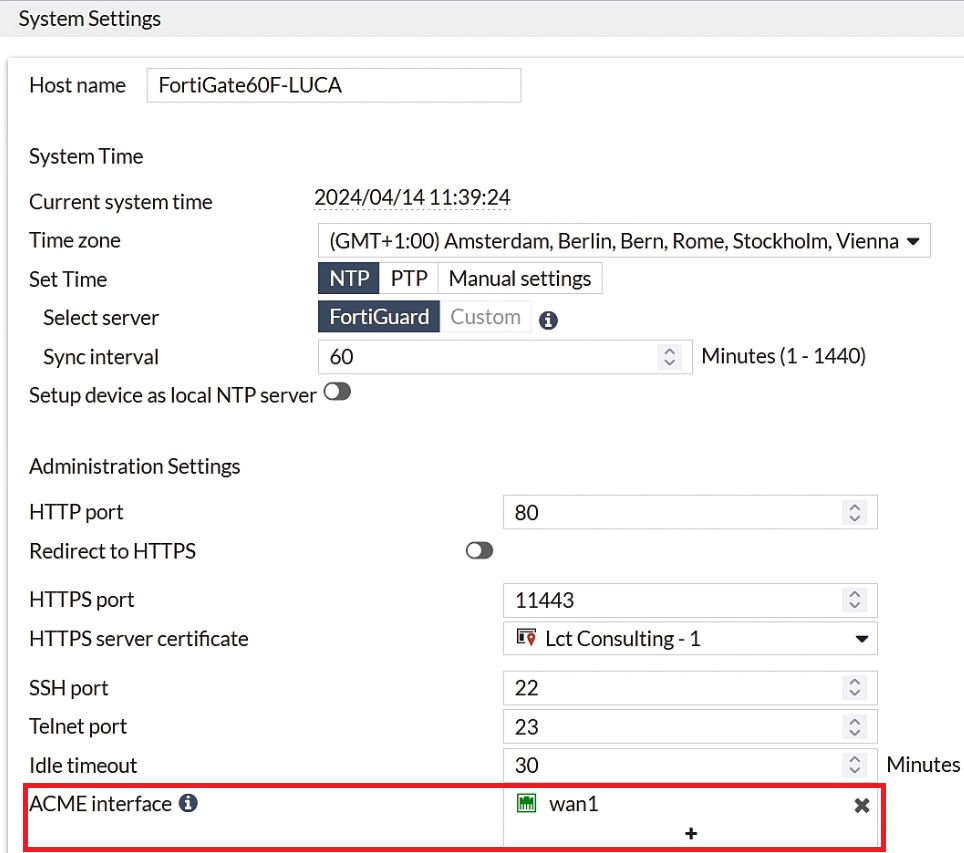
Figure 4: Adding a FortiGate interface as the ACME Interface
At this point we are ready to issue a digital certificate via Let’s Encrypt.
Generating an SSL certificate via Let’s Encrypt
By default the tab dedicated to certificates is not visible within the FortiGate menus, therefore it is necessary to make the feature visible.
Once you have logged in to the FortiGate via the web interface, in the left-hand column click “System”:
Figure 5: Click “System”
Then choose the “Feature Visibility” option from the menu:
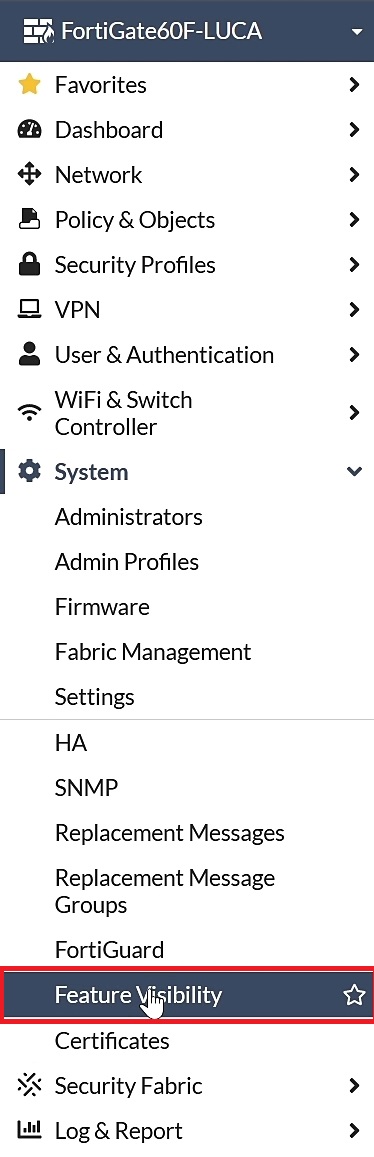
Figure 6: Click “Feature Visibility”
In the panel that opens, move to the right, under “Additional Features”, and select “Certificates”:
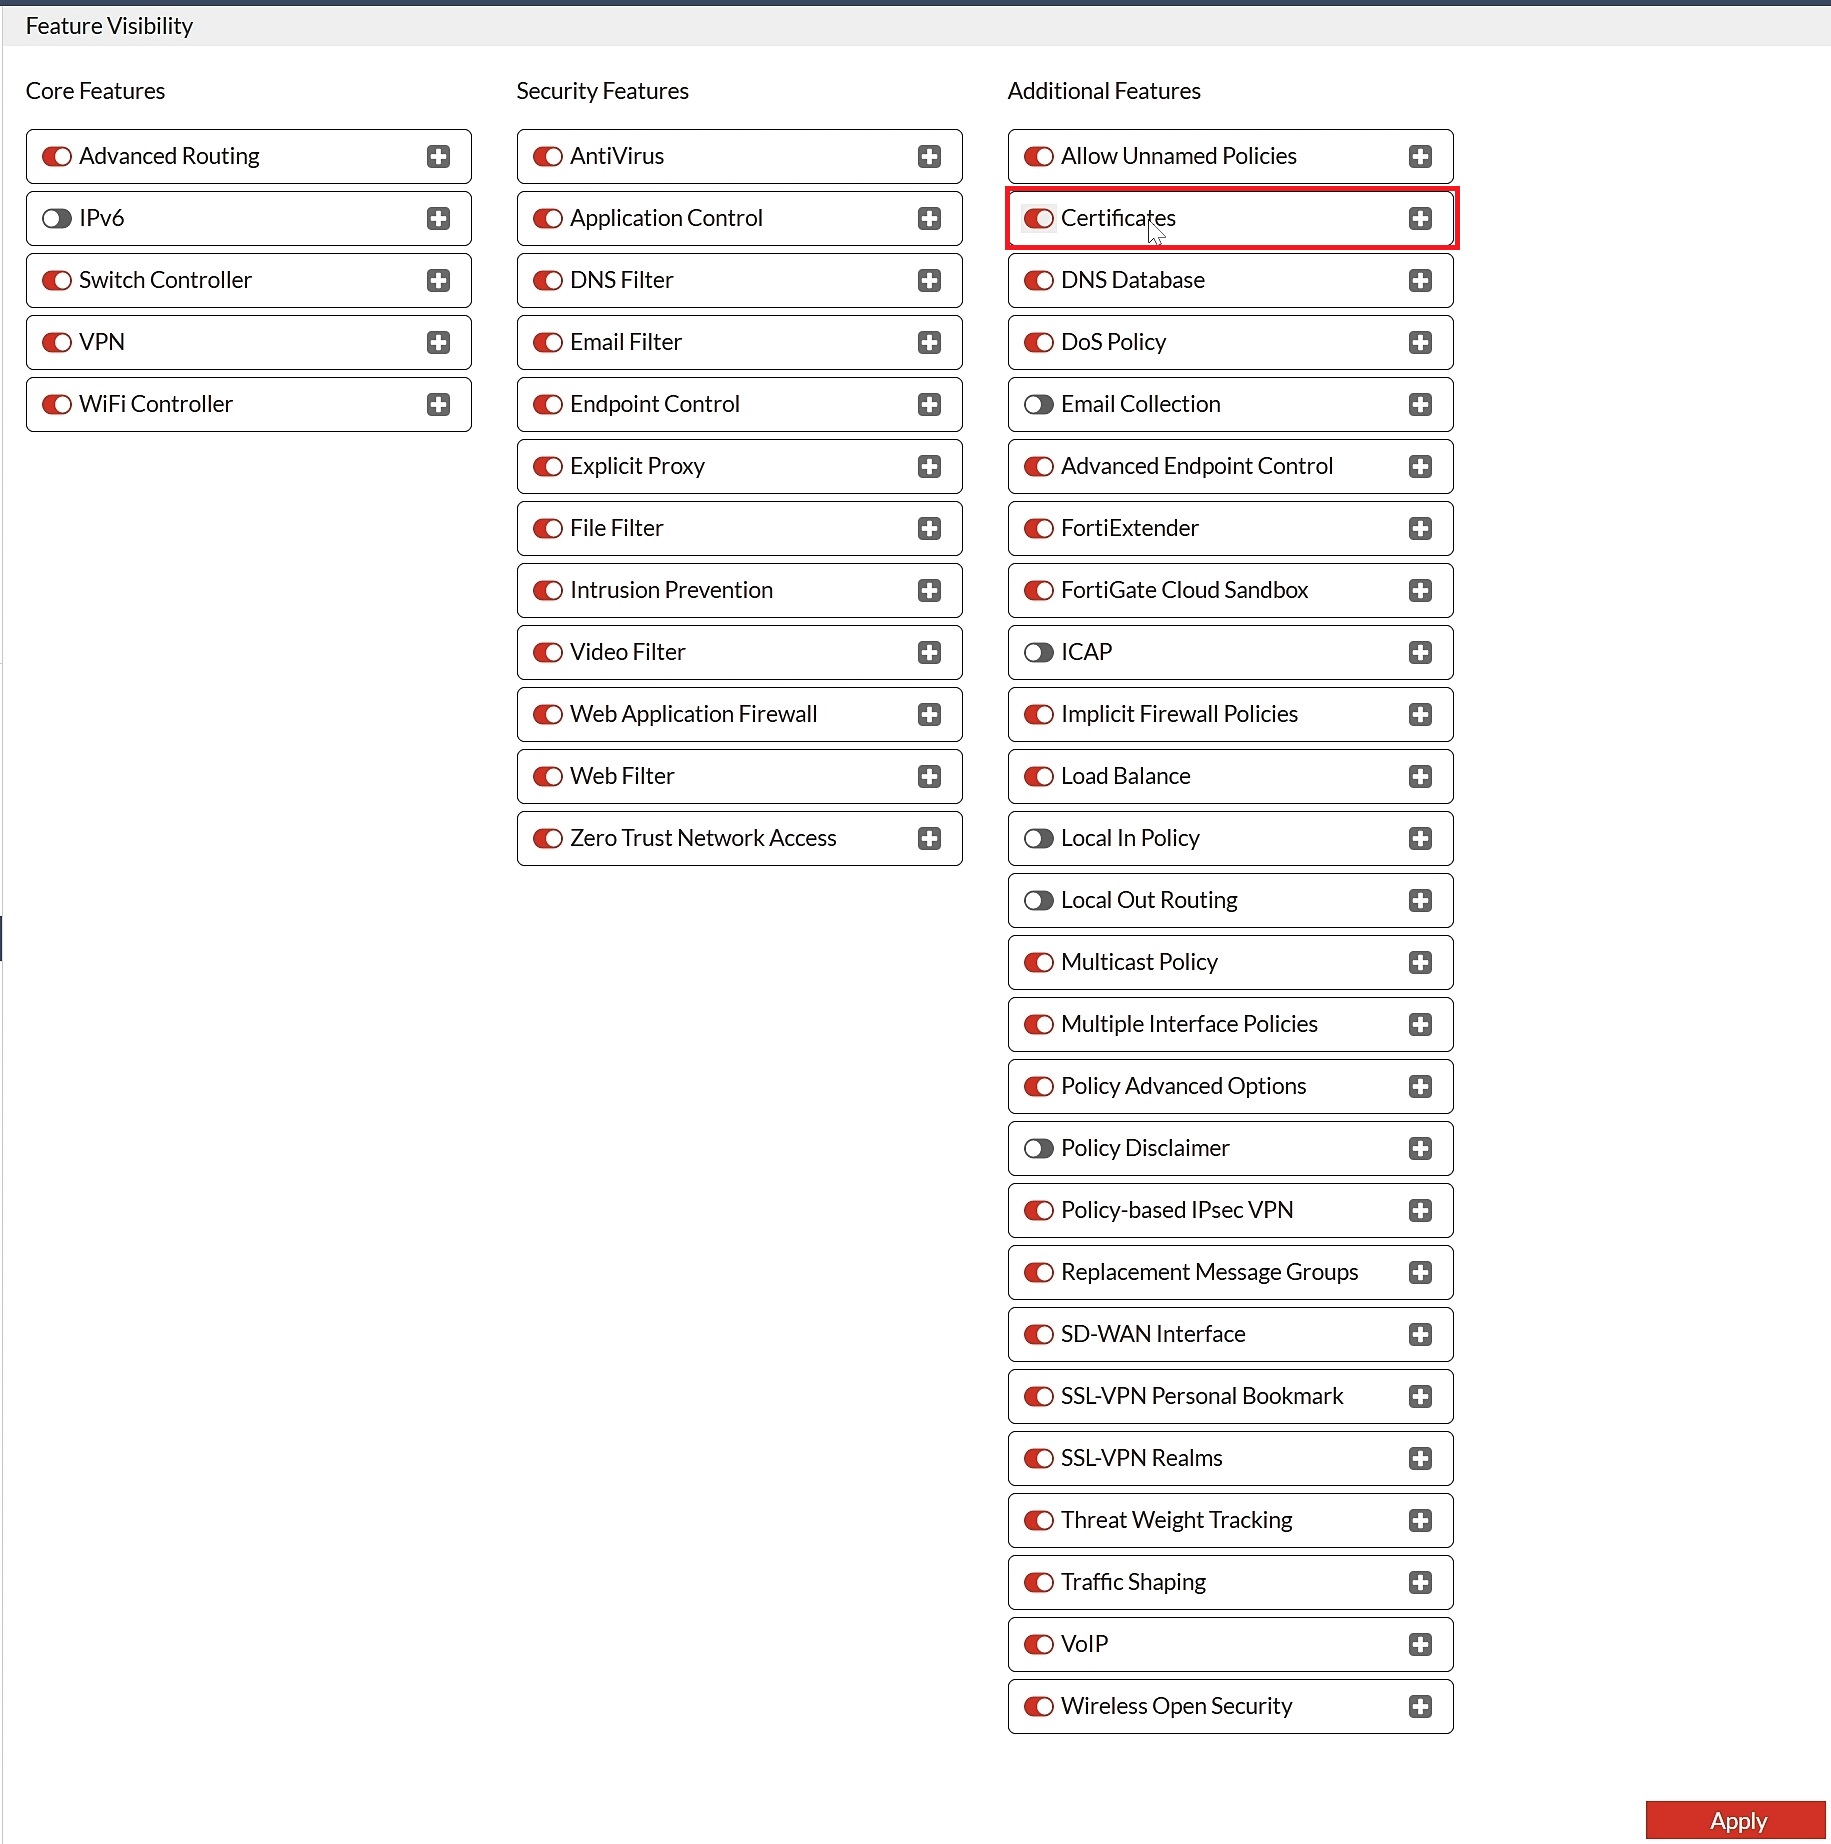
Figure 7: Enabling certificate management within the FortiGate
At this point you will be able to manage the FortiGate certificates from the graphical interface.
Let’s now move to the public DNS management. Of course, for each provider there will be a different procedure; in this guide GoDaddy was used.
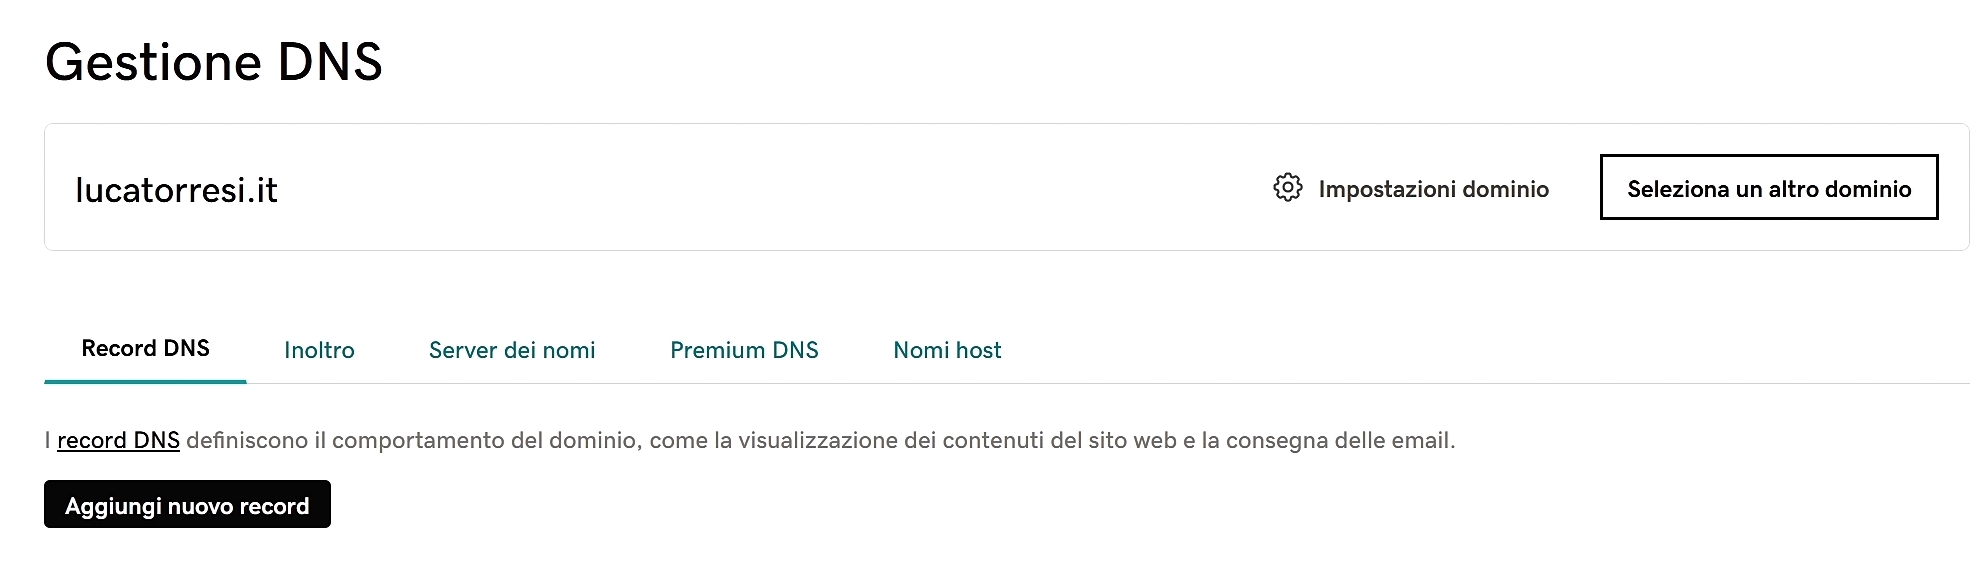
Figure 8: Opening the public DNS management panel
Once on your provider’s website, move to the DNS management and then click “Add new record”:

Figure 9: Adding a DNS record
Now let’s add an “A” record that will have the name “vpn.domainname.it” and your public IP, then click “Save”:

Figure 10: Adding the “A” Record in the public DNS
Adding the record will take a certain amount of time, so let’s wait for it to be correctly propagated.
Figure 11: DNS record update
Once the configuration is complete, the new record will appear alongside all the others.

Figure 12: DNS record correctly added within the public DNS
Returning to the FortiGate, you can continue the configuration by moving to “System”, then “Certificates”:
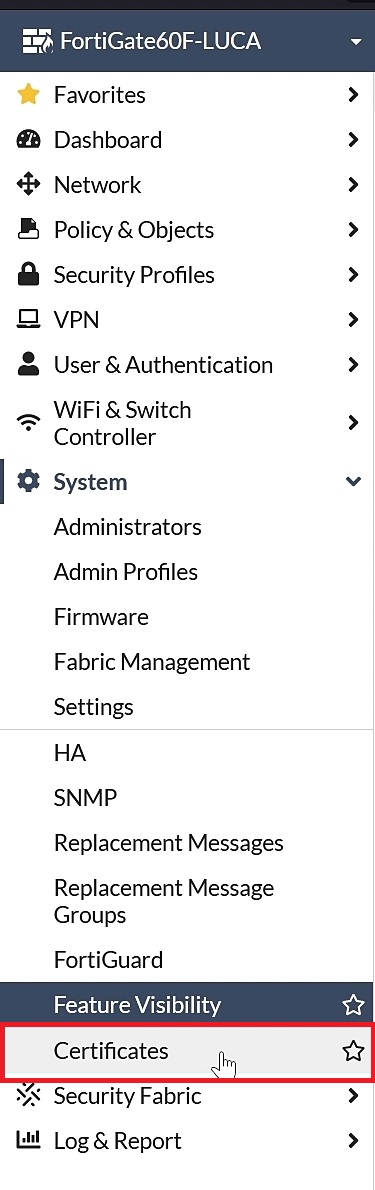
Figure 13: Moving to the FortiGate certificate management section
In the central section of the page, at the top, click “Create/Import”:
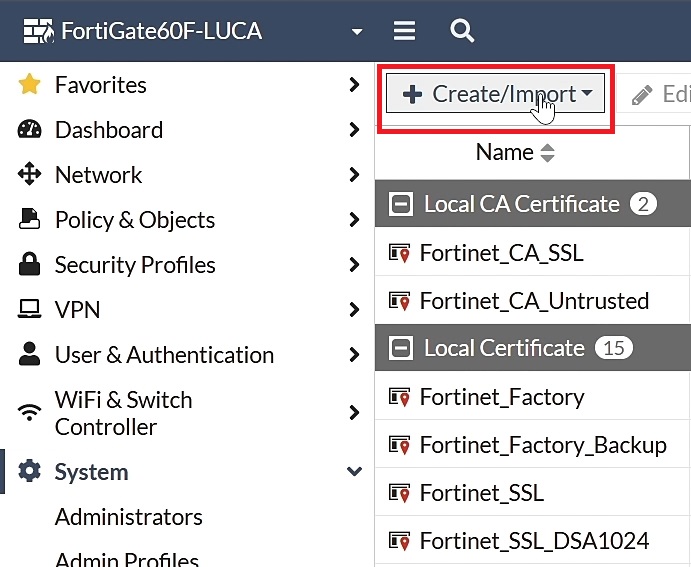
Figure 14: Click “Create/Import”
Then click “Certificate”:
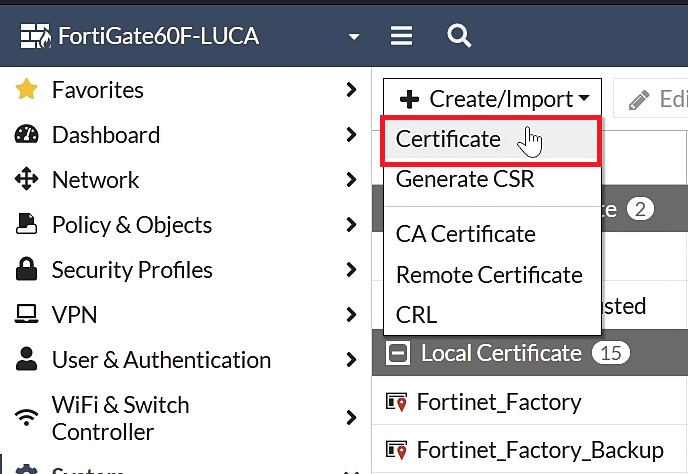
Figure 15: Click “Certificate”
In the screen that appears on the right, click “Use Let’s Encrypt”:
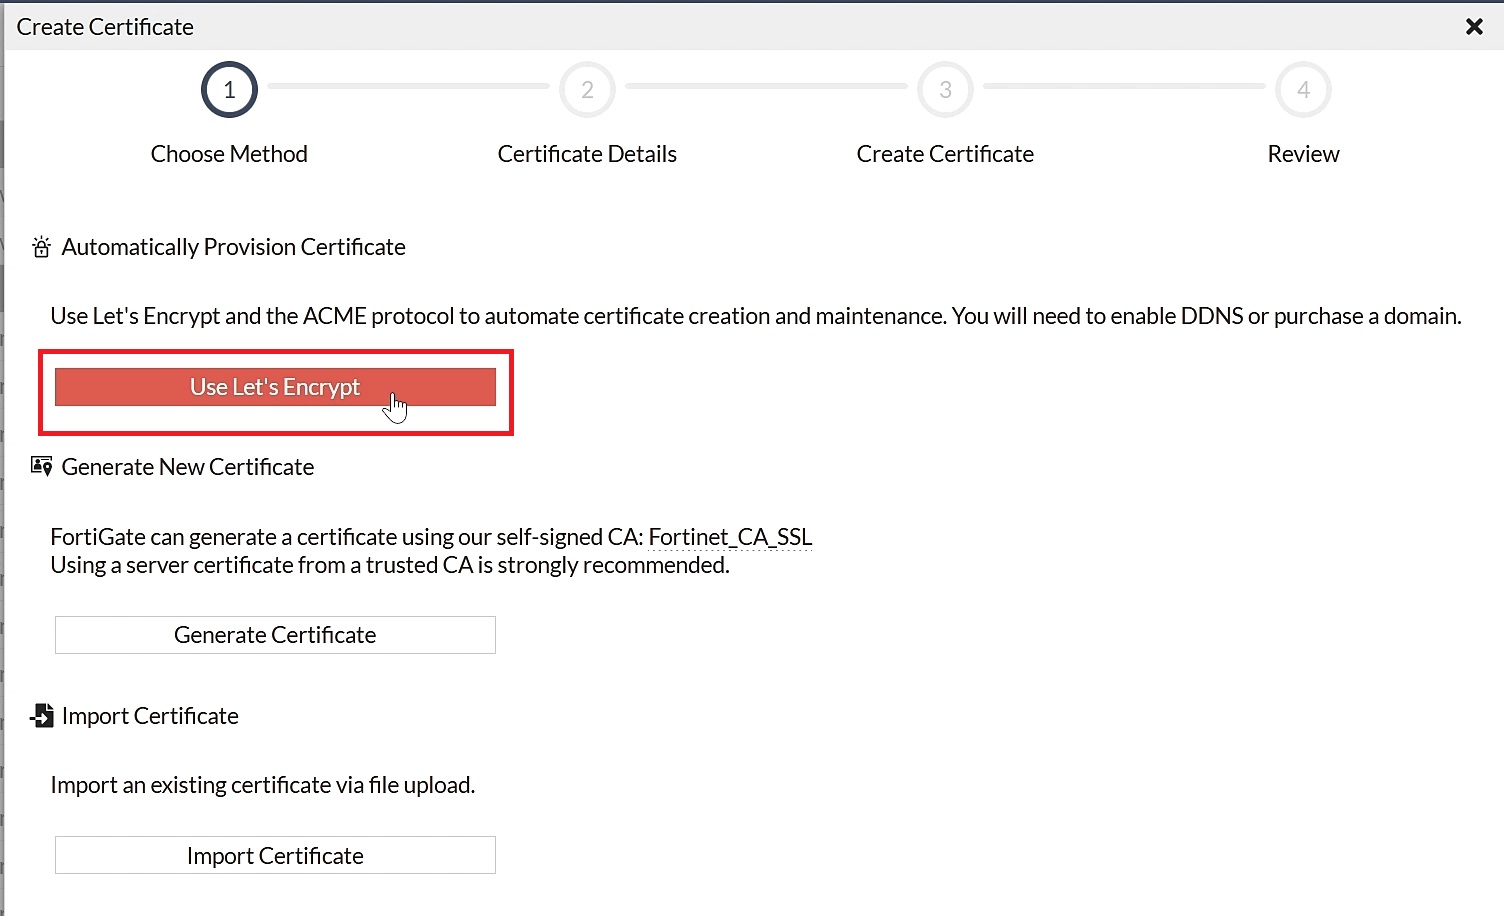
Figure 16: Selecting “Use Let’s Encrypt” as the certificate generation system
Fill in the “Certificate Details” section with the data used to add the “A” record in the public DNS, adding an email address of yours:
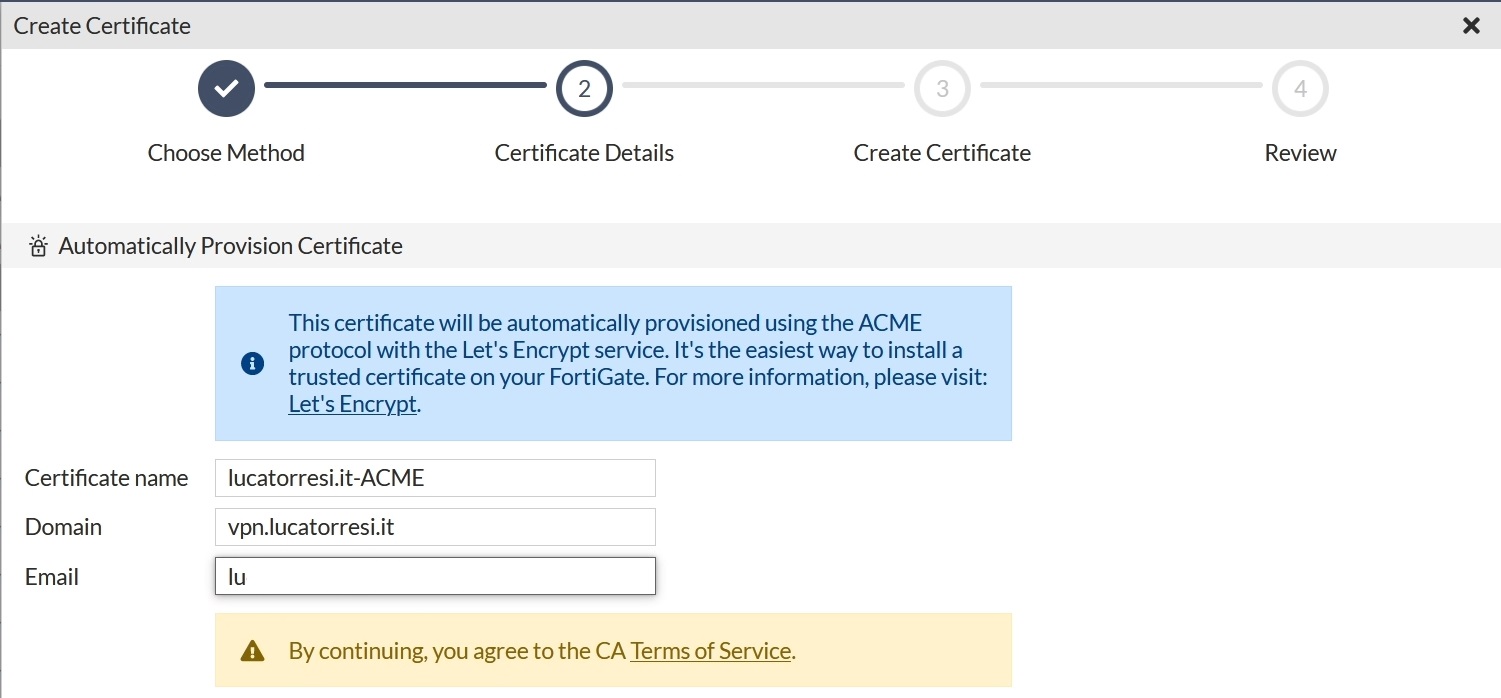
Figure 17: Adding the details of the SSL certificate to be issued
Click “Create” to confirm the operation.

Figure 18: Click “Create”
Once the procedure is complete you can verify the result from the “Review” section:
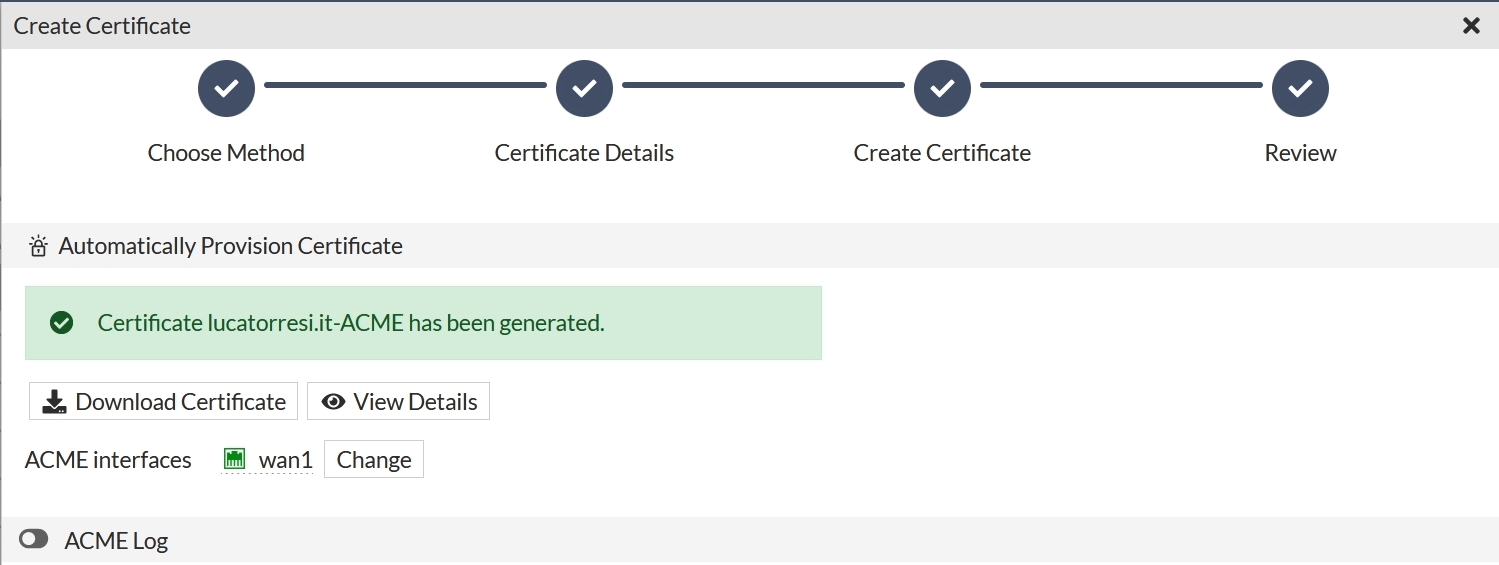
Figure 19: Issuance of the certificate
At this point you can download the certificate you have just created or continue with the guide.
Returning to the “Certificates” section, you can verify that the SSL certificate has been correctly added to the FortiGate’s list of certificates:
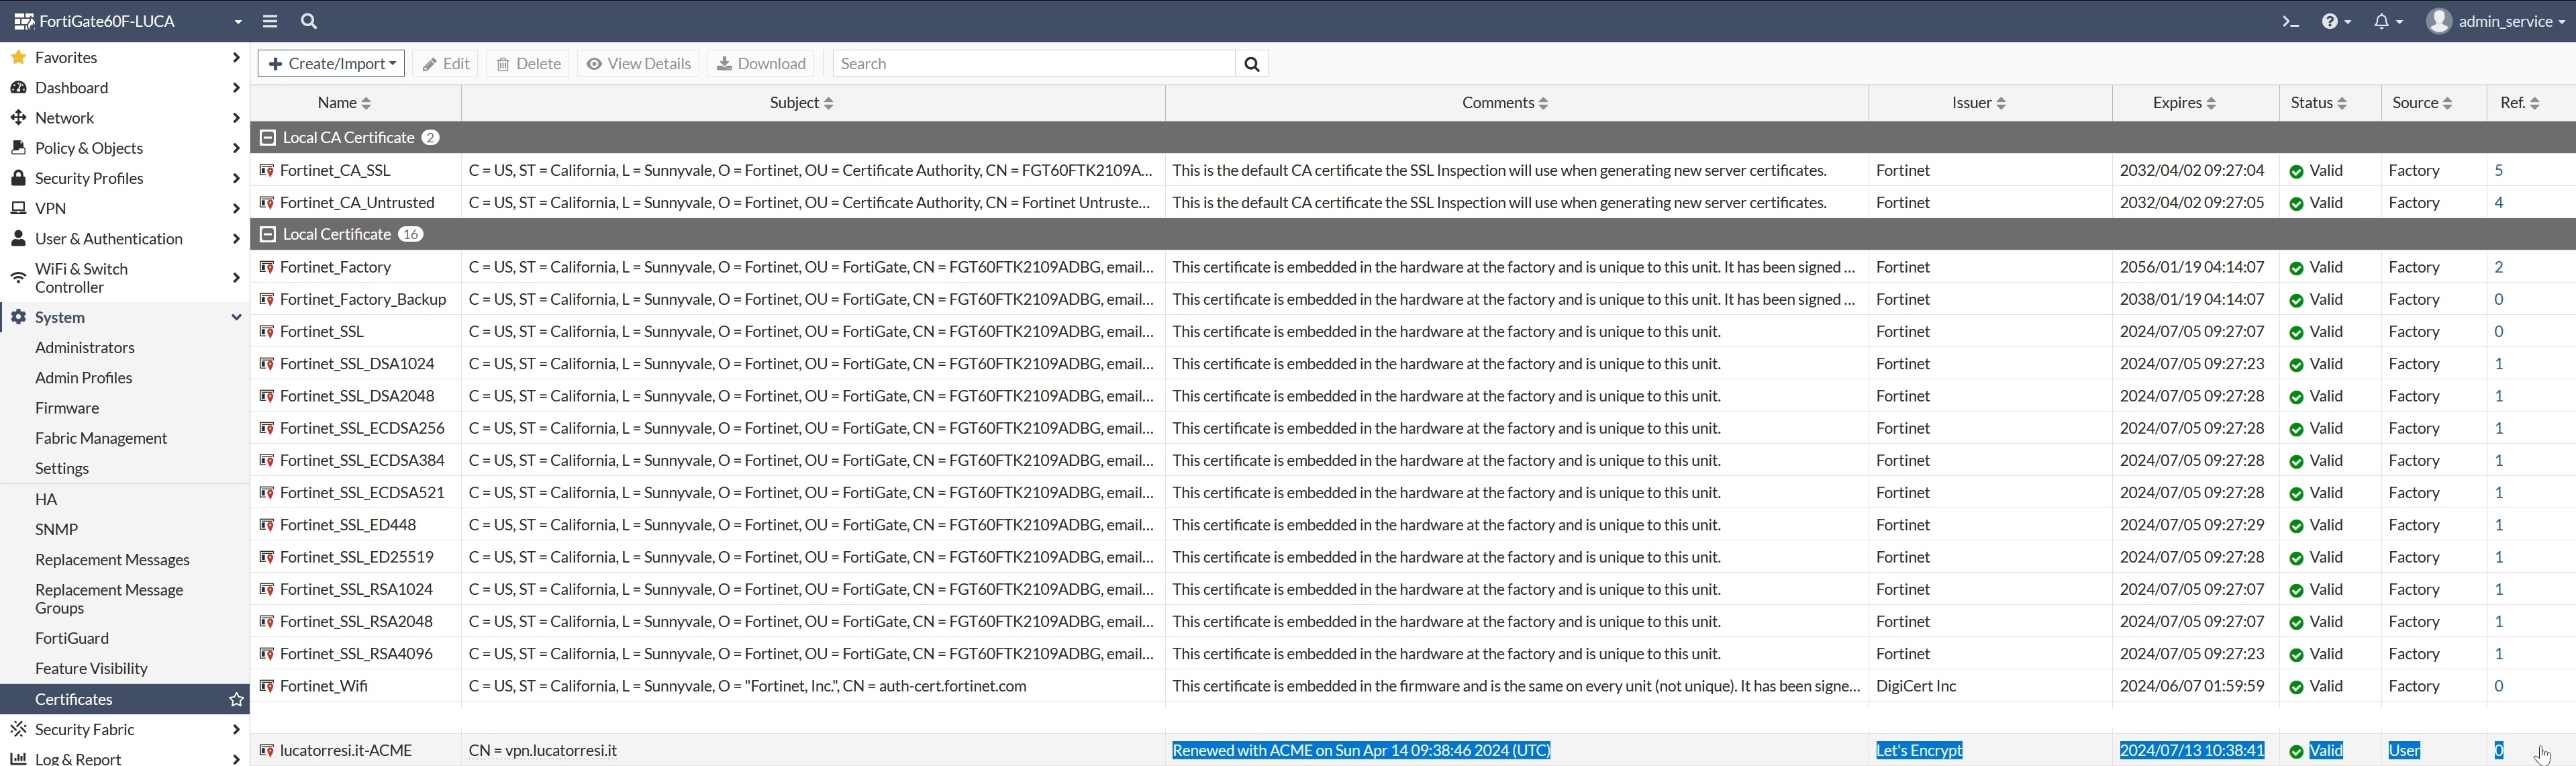
Figure 20: The certificate is stored within the FortiGate’s “Certificates” section
Adding the certificate to the SSL VPN
The newly issued certificate can be used immediately to raise the security level of our SSL VPN infrastructure.
Once you have logged in to the FortiGate via the web, you can click the “VPN” tab in the left-hand column, then “SSL-VPN Settings”:
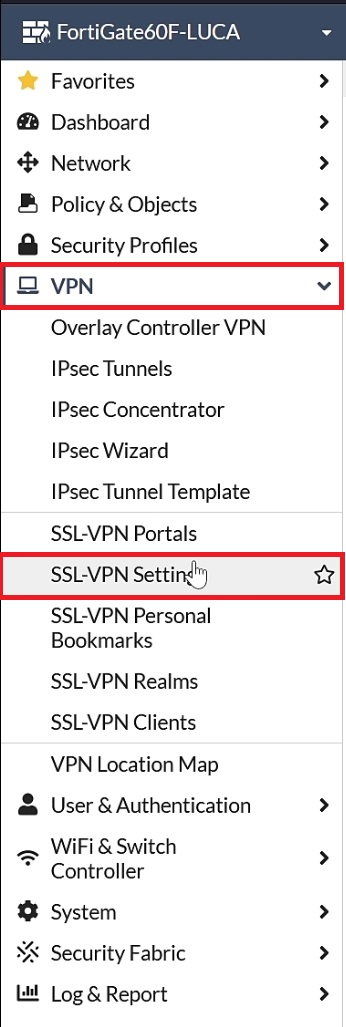
Figure 21: Click the “VPN” tab and then “SSL-VPN Settings”
Within the “SSL-VPN Settings” configuration screen, move to the “Server Certificate” entry, then select the newly generated certificate:
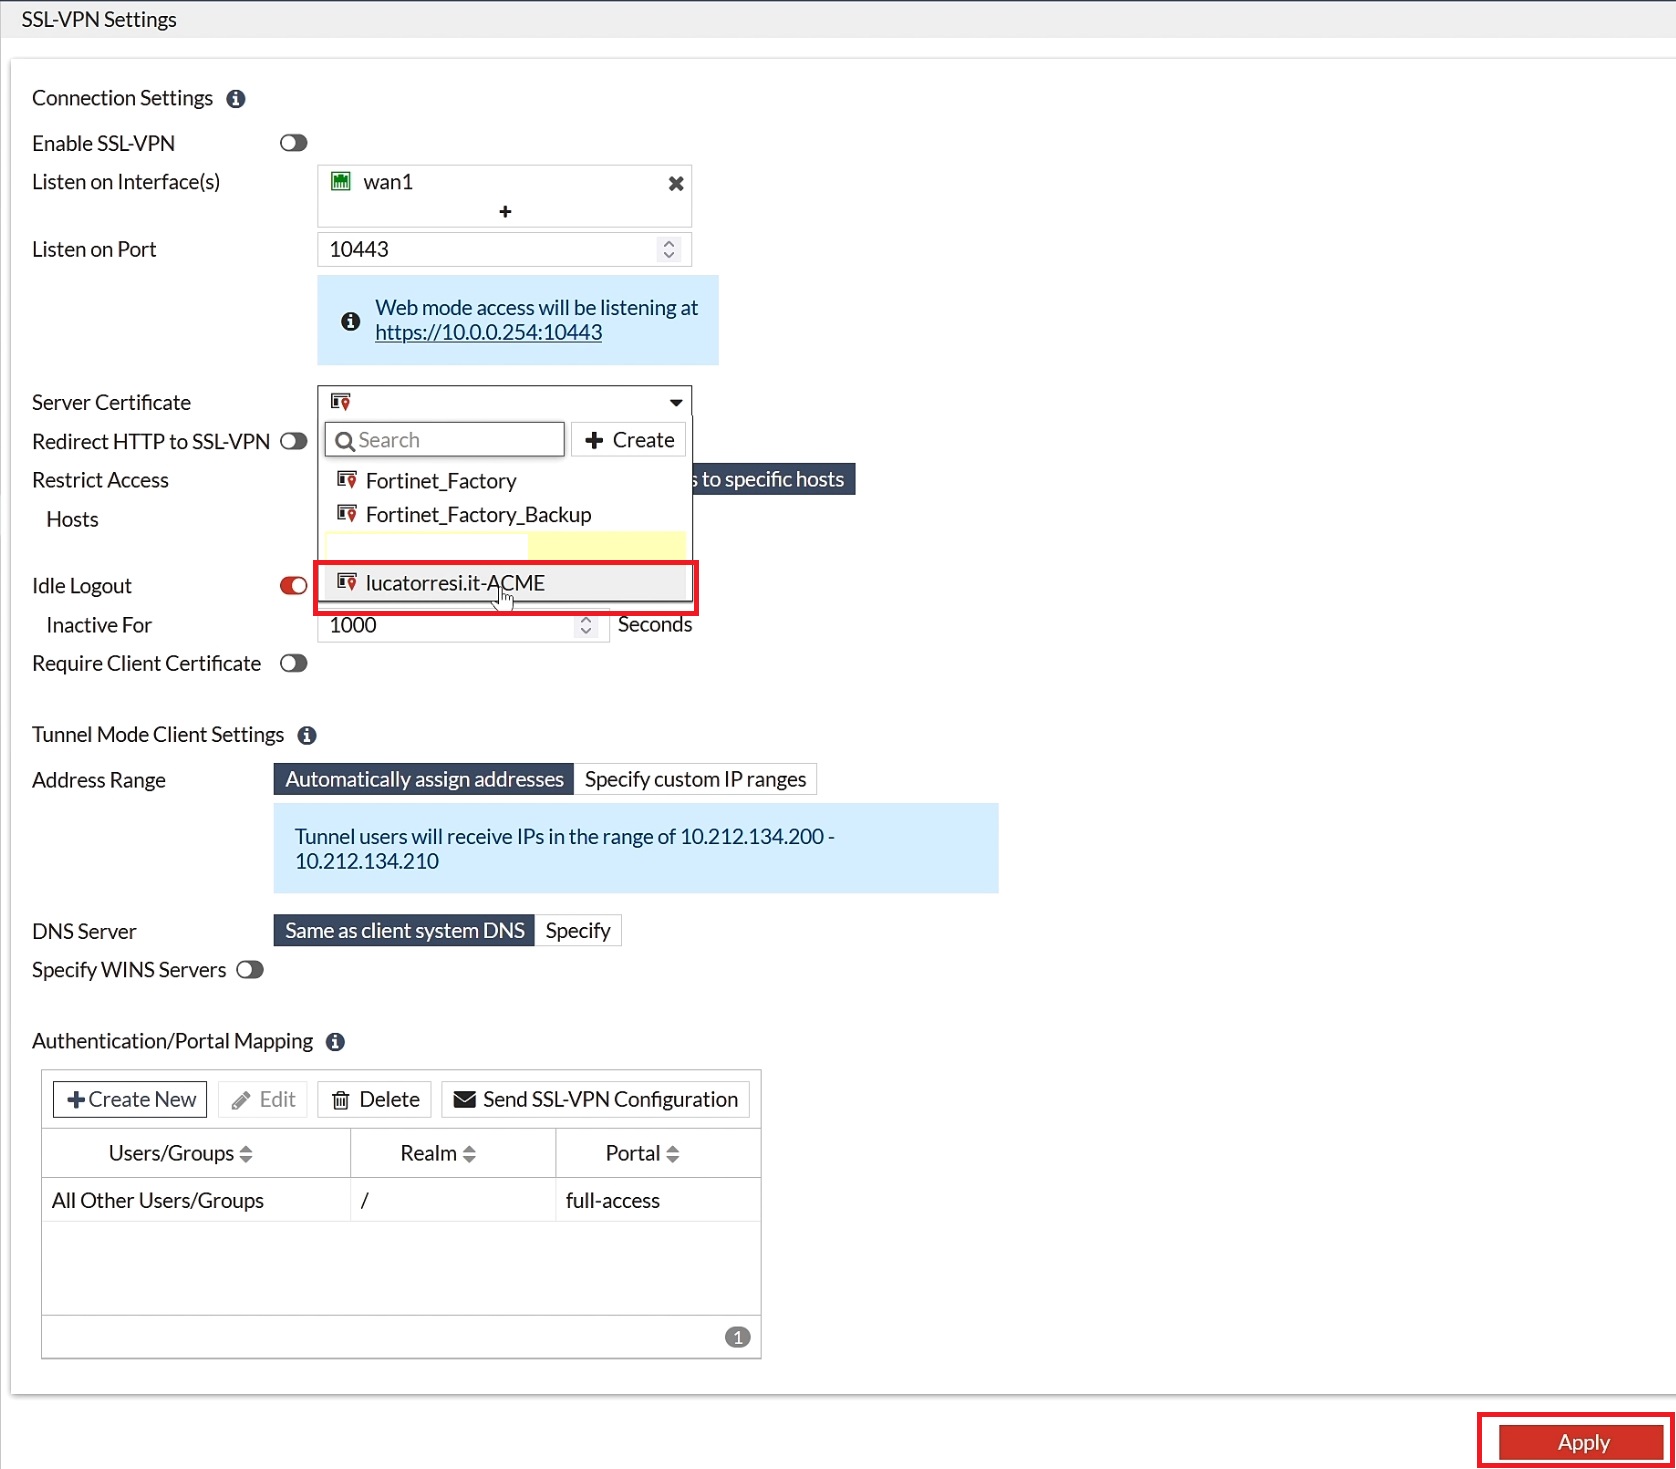
Figure 22: Adding the Let’s Encrypt certificate to the FortiGate SSL VPN
Click “Apply” to confirm the configuration.
Adding the certificate for administrative access to the FortiGate
Another essential element to protect is the FortiGate web interface, avoiding exposing it externally with a self-signed certificate.
Once you have logged in to the FortiGate via the web, you can click the “System” tab in the left-hand column, then “Settings”:
Figure 23: Configuring the FortiGate Settings
Within the “System Settings” configuration screen, move to the “HTTPS Server Certificate” entry, then select the newly generated certificate:
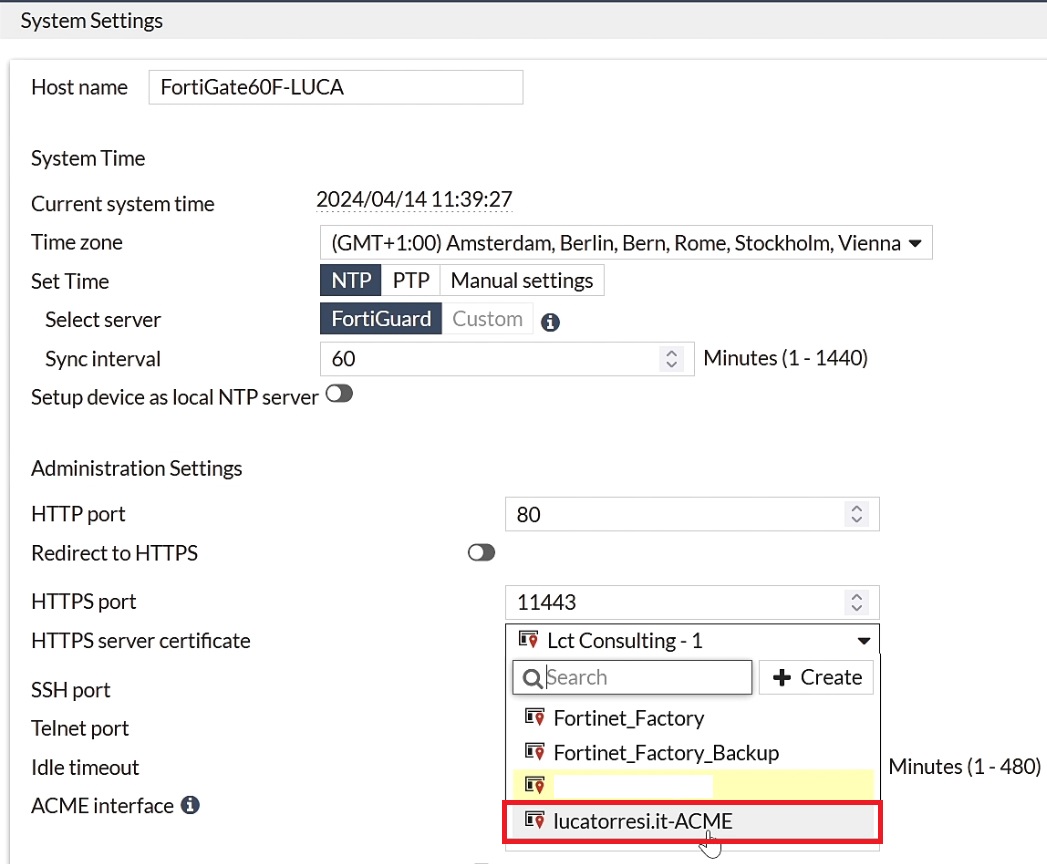
Figure 24: Selecting the new SSL certificate generated via Let’s Encrypt
At this point you can verify the complete configuration as in the picture below:
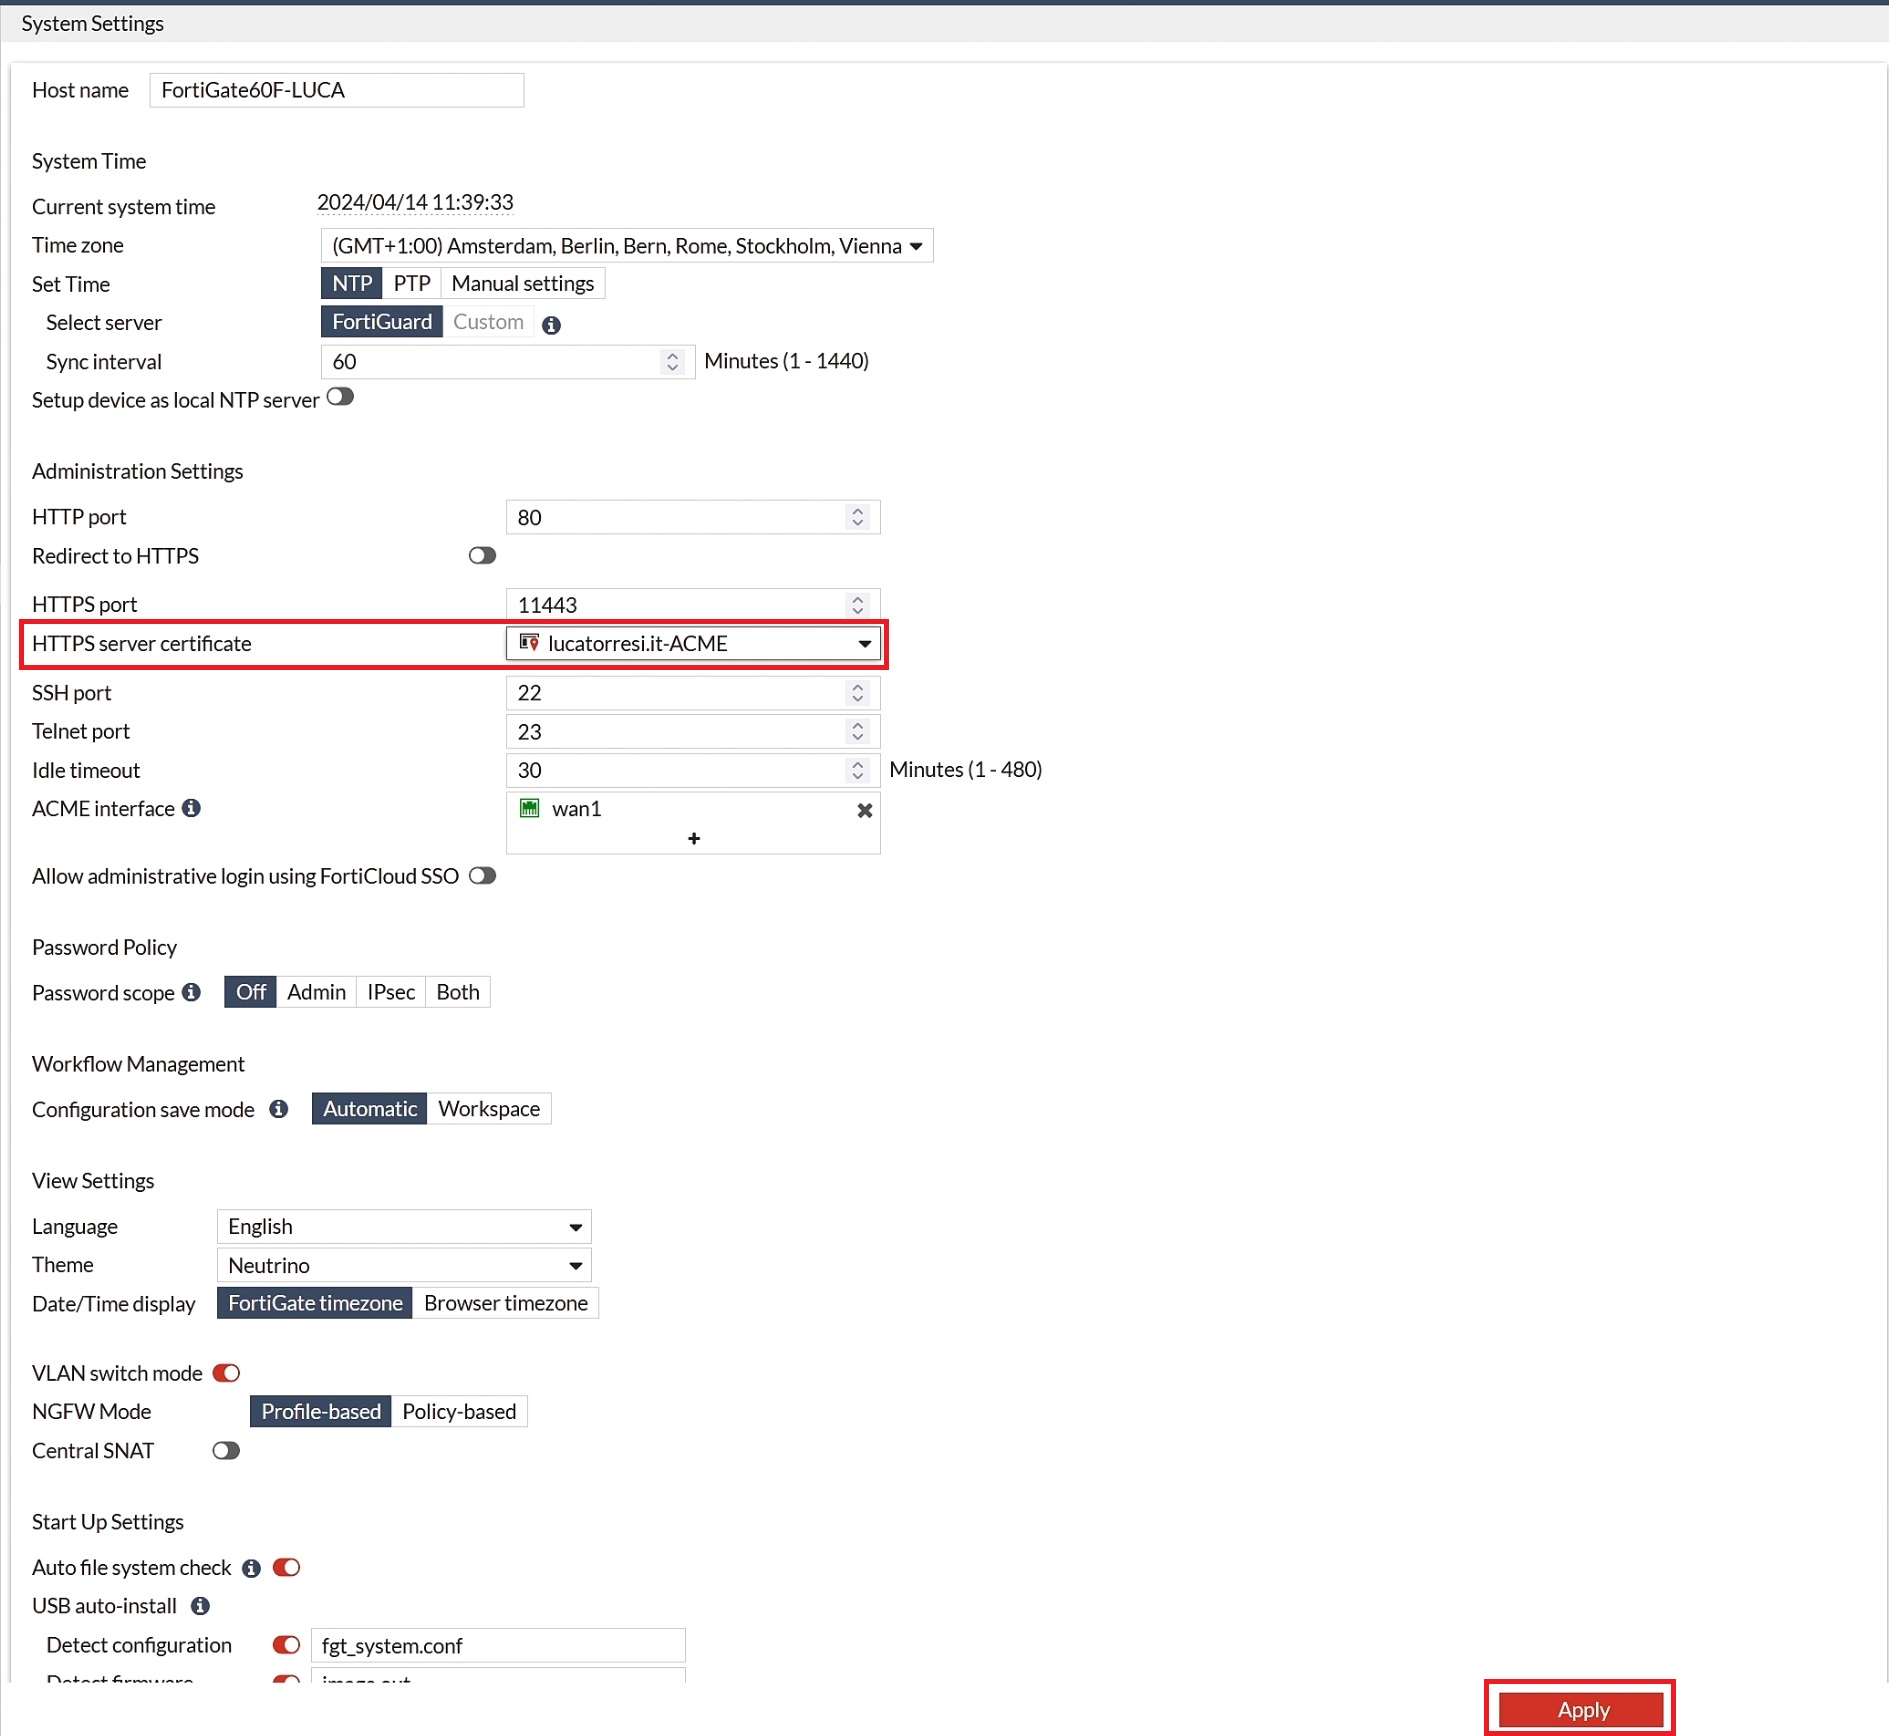
Figure 25: Final result after adding the certificate for the FortiGate management web page
Click “Apply” to confirm the configuration.
Conclusions
Fortinet, which listens closely to the feedback of professionals, is improving and adding features to its FortiOS, pushing it ever higher in the satisfaction rankings and, of course, on Gartner.
The ability to easily leverage certificate management with Let’s Encrypt will not be an absolute novelty that enterprises will rush to enable, since in certain contexts Wildcard or Multi-SAN certificates were already used, but all those small and medium-sized businesses, which may not have significant budgets, will be able to secure their FortiGate without using self-signed certificates.
It is precisely this approach and this attention towards small and medium-sized businesses that make Fortinet one of the strongest brands on the market, where it is now difficult not to find a solution based on their security appliances (there must be a reason, right?).