Fortinet: configuring an integrated LDAPS server in Active Directory
A guide to configuring an LDAPS server on FortiGate integrated with Active Directory and Enterprise CA certificates.
Last updated on
When we talk about firewalls, several solutions surely come to mind, from the most renowned to the lesser known, but before choosing one solution over another we have to ask ourselves a very important question: “Is this tool I am buying or evaluating compatible with my infrastructure context?”
From my point of view, the first thing to assess is whether the appliance can be integrated with my identity system, because if I have already chosen one system I cannot have another one just to make the tool work.
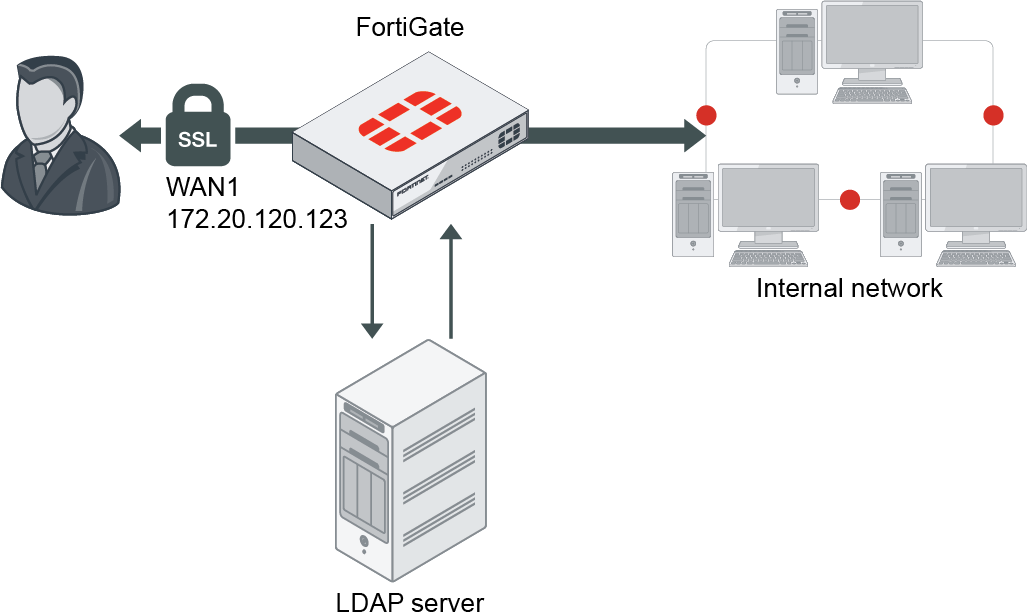
It is precisely in evaluating this scenario that the need arises to integrate the FortiGate firewall with an Active Directory infrastructure, so that we can manage, for example, VPN access with the same username and password present in Active Directory.
Figure 1: How VPN authentication works using the LDAP server configured in the FortiGate
Requirements
To perform the proposed configuration you will need the following:
-
FortiGate firewall: the proposed configuration is possible on any FortiGate firewall with software release 6.2 and later. (it may also be possible on earlier systems; this guide uses 7.2.x)
-
Active Directory domain: a single Windows Server 2012r2 or later domain controller is sufficient.
-
Enterprise Certification Authority: a single Windows Server 2012r2 or later machine is sufficient.
Creating the LDAP service account
The first step is to create a dedicated account that will handle LDAP queries against the Active Directory server.
So, create a new user with the name and password you prefer inside a dedicated Organizational Unit.
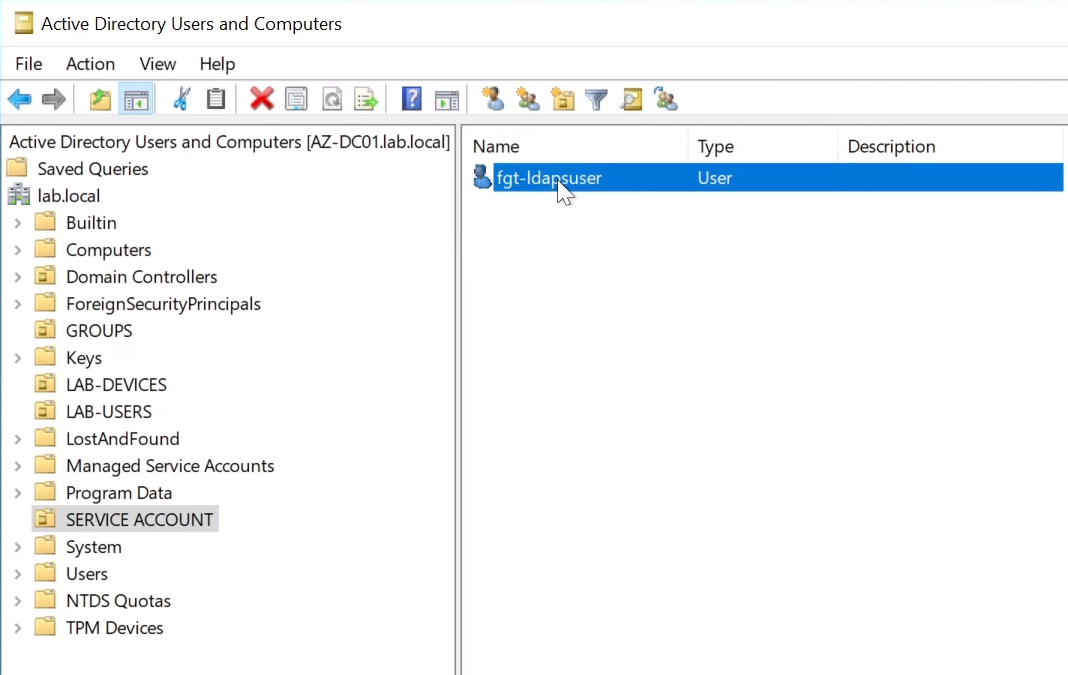
Figure 2: Creating a dedicated Standard User for LDAP queries within the FortiGate
The account you have just created must be of “Standard” type; it does not need to belong to privileged groups.
At this point, to allow the newly created user to operate correctly, you will need to grant delegation permissions within all the OUs containing the users you want to manage.
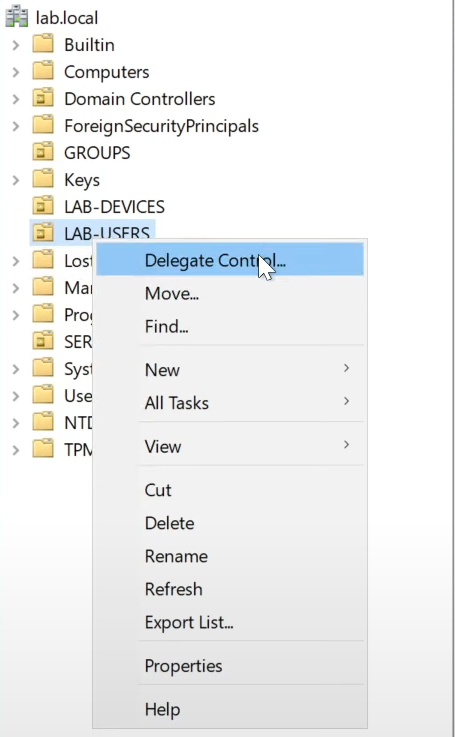
Figure 3: Adding the delegation for the fgt-ldapuser user within a single OU
Now let’s add the user inside the wizard by clicking “Add…” and then “Next”:
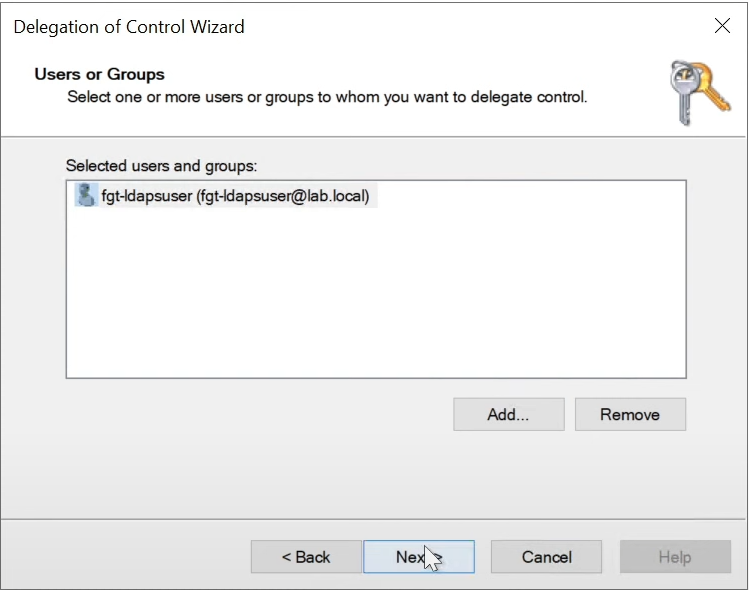
Figure 4: Adding the user within the Active Directory delegation wizard
At this point click “Create a custom task to delegate” and then “Next”:
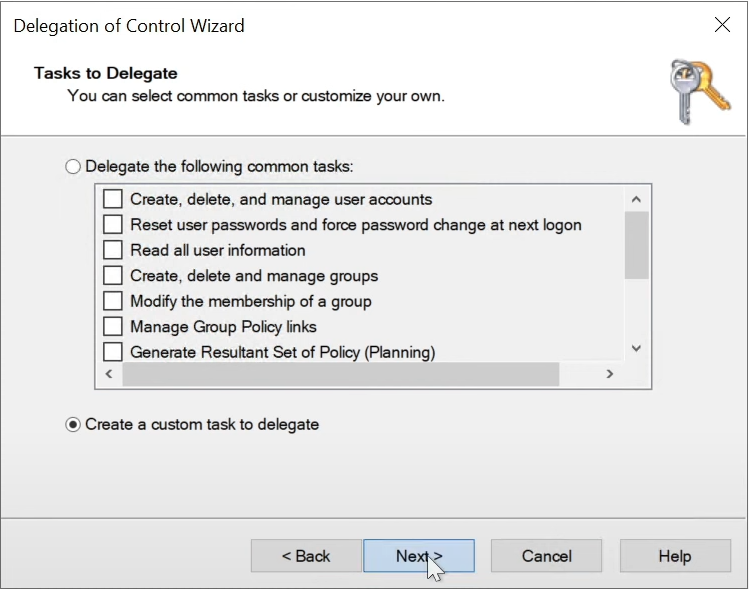
Figure 5: Option to select in order to create a custom delegation role
Now select “User Objects” and then “Next”:
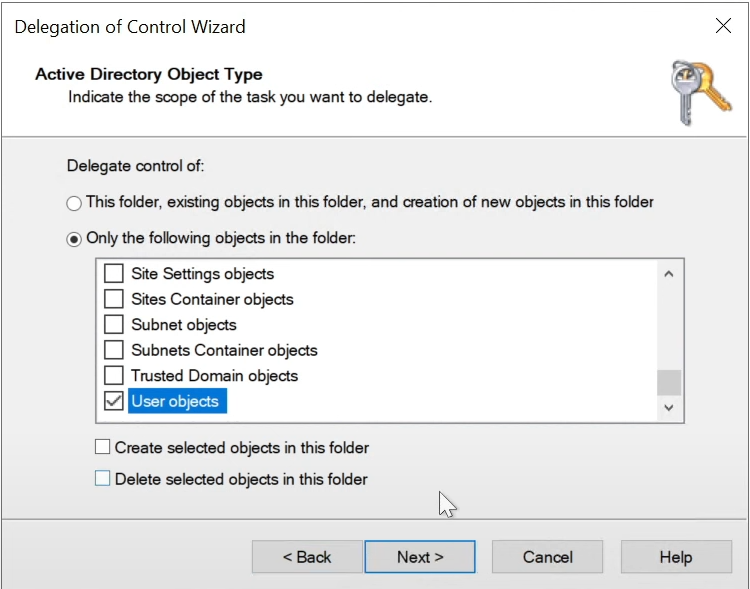
Figure 6: Selecting the User Objects entry
Now click “General” and the “Change password” and “Reset password” permissions
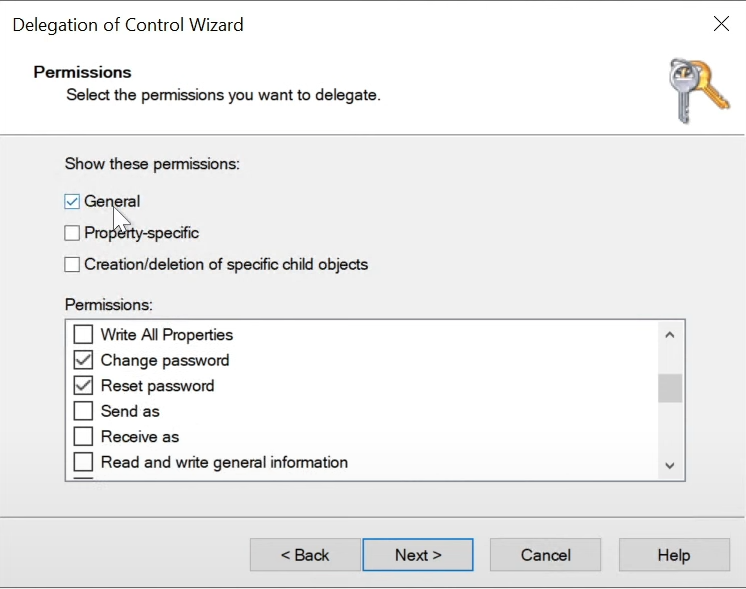
Figure 7: Assigning permissions within the General tab
At this point click “General” again to remove the check, then click “Property-specific”:
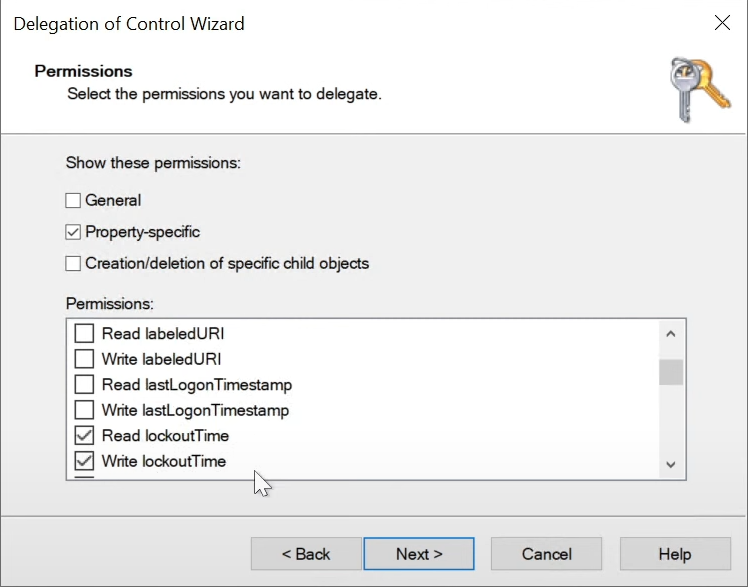
Figure 8: Adding Property-specific permissions
At this point, add the following permissions:
-
Write lockoutTime
-
Read lockoutTime
-
Write pwdLastSet
-
Read pwdLastSet
-
Write UserAccountControl
-
Read UserAccountControl
When you are done, click “Next” and then “Finish”
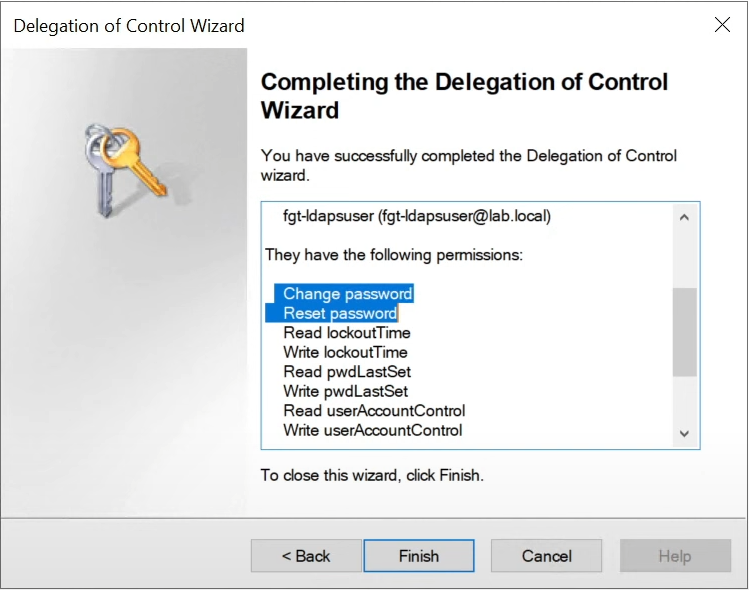
Figure 9: Completing the wizard with a summary of the added permissions
FortiGate configuration
Now we can configure the FortiGate firewall so that it can communicate with Active Directory over the LDAPS protocol.
First, let’s log in to the appliance, then browse the left-hand column, under “System” click “Certificates”
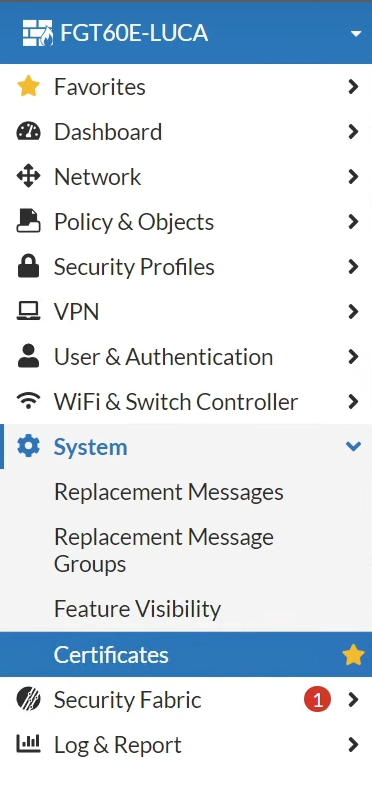
Figure 10: The FortiGate tab dedicated to certificate management
N.B. If you use VDOMs you will need to select the correct one; in this guide the LDAPS server configuration was performed in the Root VDOM:
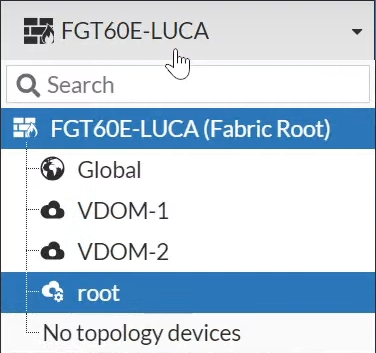
Figure 11: Selecting the correct VDOM during configuration
At this point you can import the Enterprise CA certificate into the FortiGate firewall by clicking “Create/Import” and then “CA Certificate”:
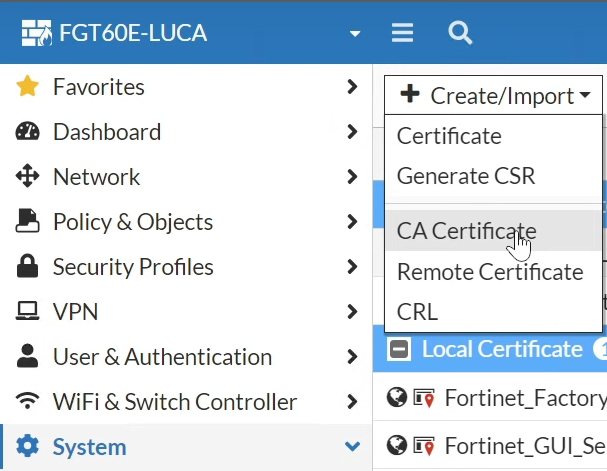
Figure 12: Selecting the type of certificate to import
N.B. If you have a multi-tier PKI infrastructure you will need to import the certificates of all the CAs in the tree (e.g. RootCA + SubCA).
In the tab that opens on the right side of the screen, click “File” and then “Upload”:
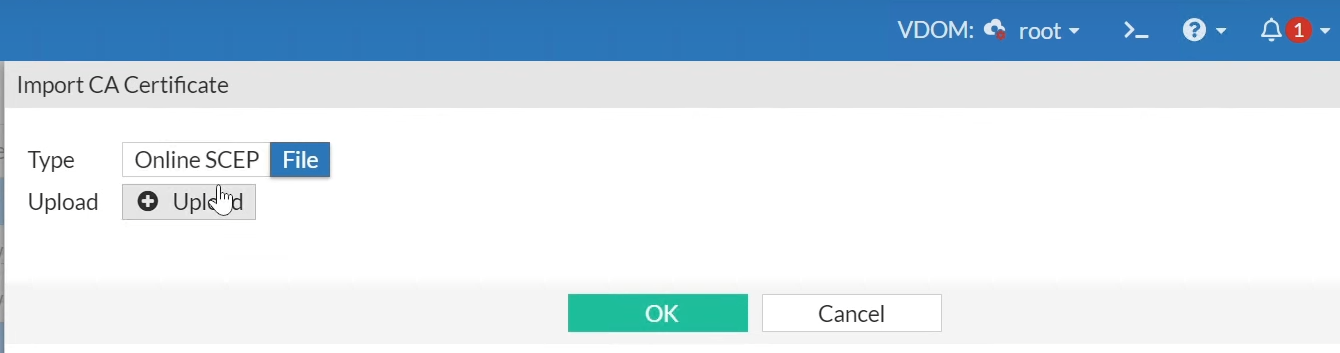
Figure 13: Selecting the file type used for the RootCA certificate
Then select the RootCA certificate, which for convenience you can retrieve on the RootCA server at the path: “C:\Windows\System32\CertSrv\CertEnroll”
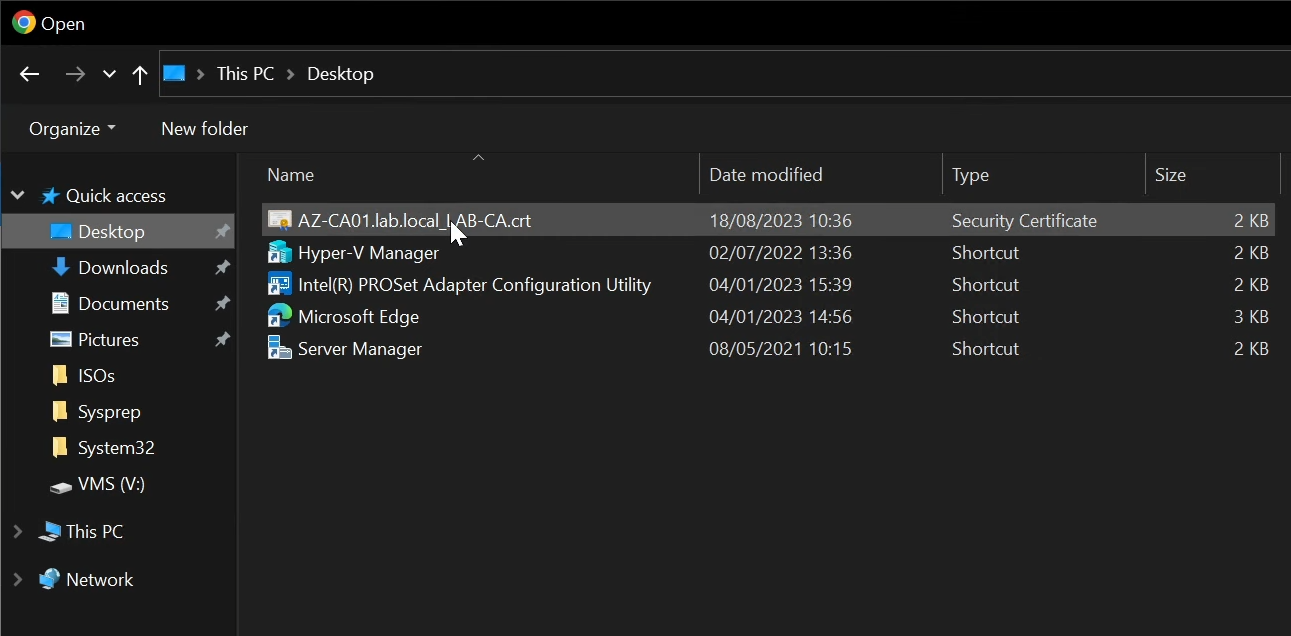
Figure 14: Selecting the certificate to import into the FortiGate
At this point you can click “OK” to add the certificate:
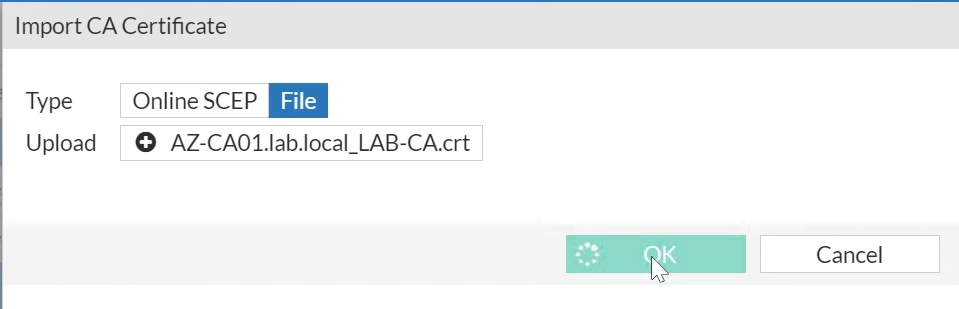
Figure 15: Confirming the certificate you have just uploaded
Once imported, you will find the certificate under “Remote CA Certificate”:

Figure 16: Certificate imported into the “Remote CA Certificate” group
Firewall DNS configuration
In order for the FortiGate to correctly resolve the IP of the LDAP server, you must configure the firewall to use the DNS of the domain controller present in the infrastructure.
N.B. If the FortiGate is unable to resolve the FQDN of the LDAP server, the certificate will not be validated and consequently the LDAPS connection will not work correctly.
To configure the FortiGate DNS, click “Network”, then “DNS”
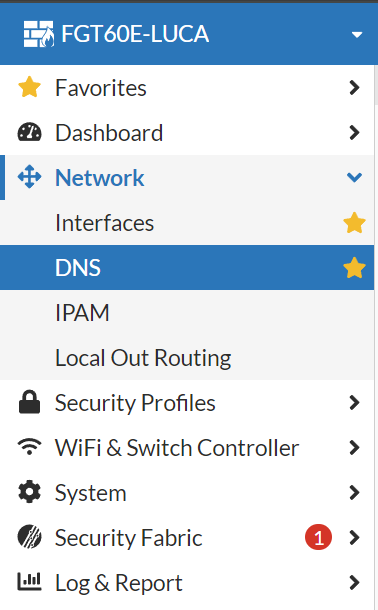
Figure 17: DNS settings of the FortiGate firewall
In the screen that opens, under “DNS Settings”, add the IP of your DNS server, in this case the Domain Controller:
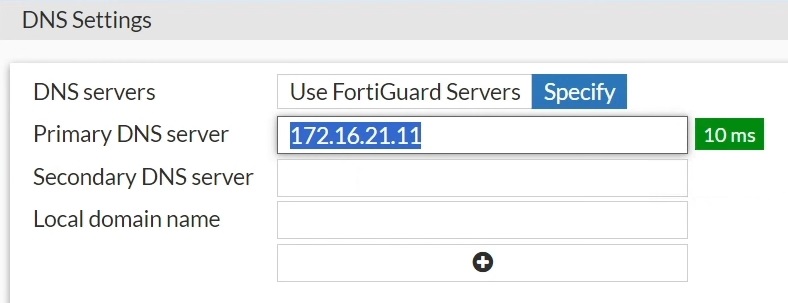
Figure 18: Adding the Domain Controller IP
N.B. With a VDOM configuration you must perform the DNS configuration in the most appropriate way. In this guide the DNS configuration was performed in the “Global” VDOM.
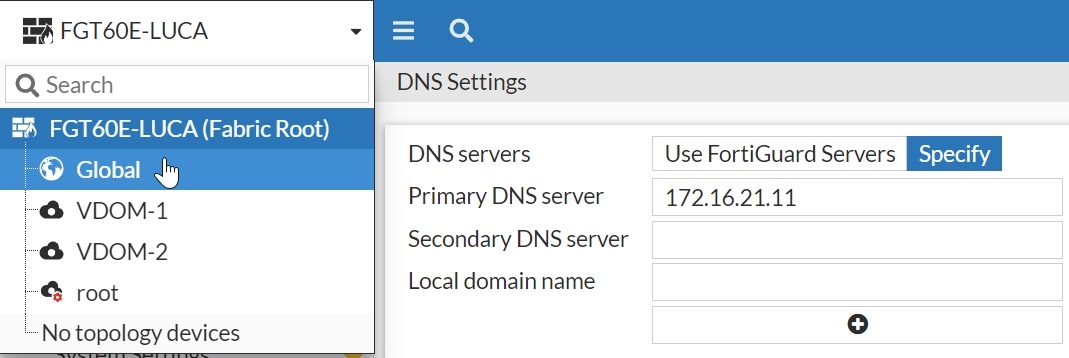
Figure 19: Selecting the VDOM for the FortiGate DNS configuration
LDAPS server configuration
At this point you can configure the LDAPS server using the RootCA certificate imported in the previous steps.
In the FortiGate left-hand column click “User & Authentication” and then “LDAP Server”
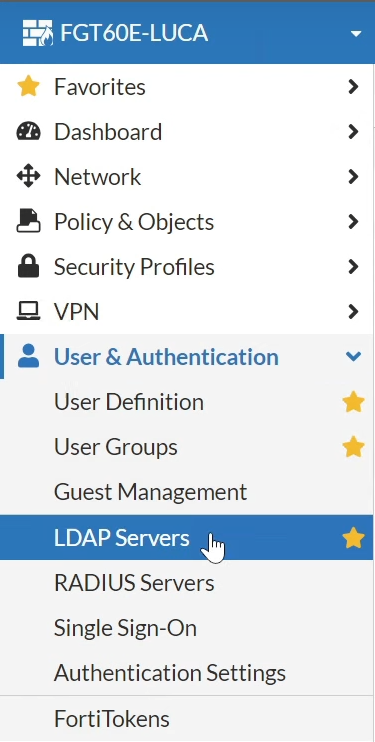
Figure 20: Selecting LDAP Servers
In the central window select “Create New”:
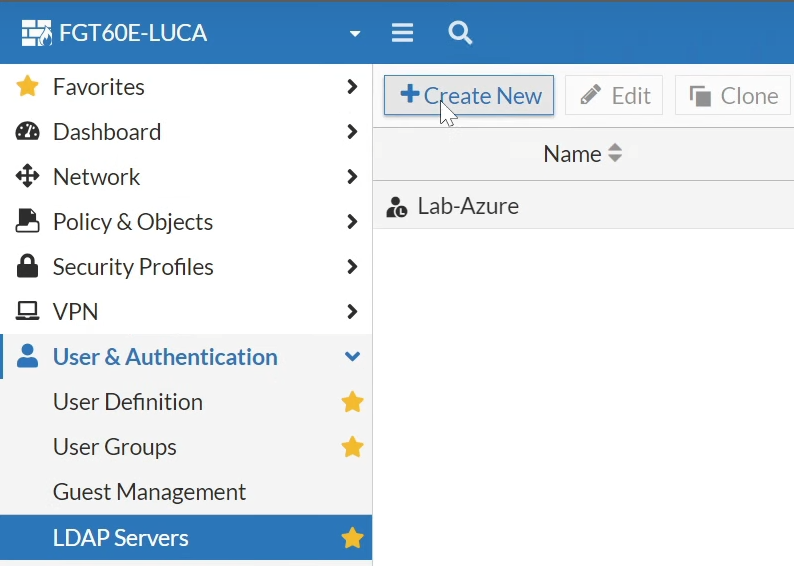
Figure 21: Selecting Create New to configure a new LDAP Server
At this point we will be asked to configure the server’s main settings, so let’s configure them as in the picture below:
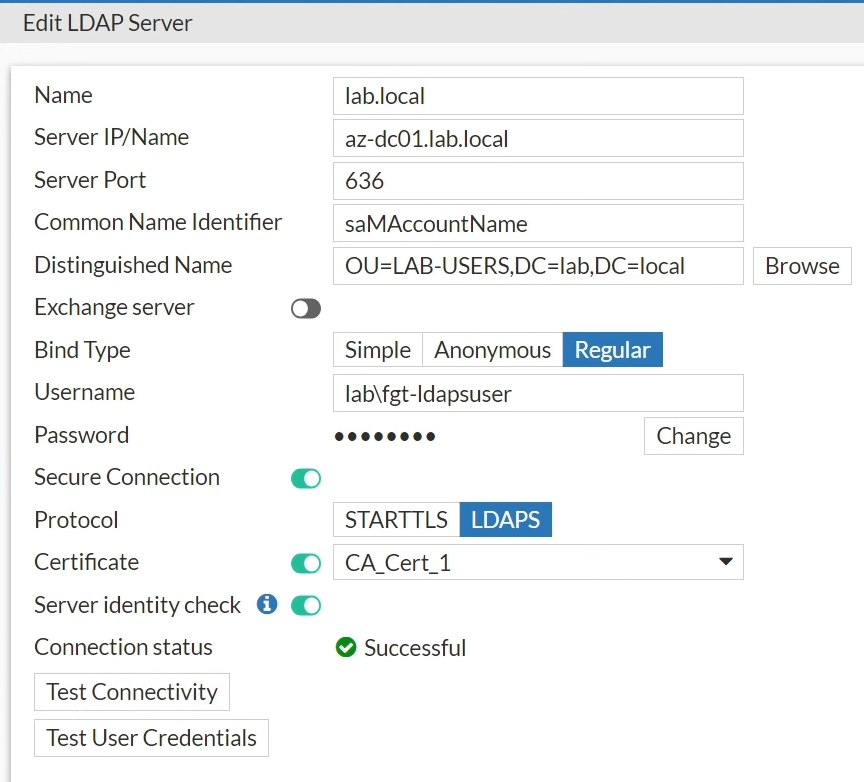
Figure 22: Adding the LDAPS configuration parameters
Here is the explanation of the main parameters:
-
Name: Name of the LDAP configuration we want to create; you can assign any name.
-
Server IP/Name: Name of the LDAP server, in this case the Domain Controller.
-
Server Port: Communication port of the service, in this case LDAPS (Port 636).
-
Common Name Identifier: Within the FortiGate, users can be represented in different ways; for this guide I used the Common Name.
-
Distinguished Name: Organizational Unit where the firewall can run LDAP queries to add users into the FortiGate.
-
Bind Type: For this configuration you must use the “Regular” type.
-
Username/Password: Username and password of the user defined in the previous steps, in this case “fgt-ldapuser”
-
Secure Connection: This parameter enables the options for configuring the LDAPS protocol.
-
Protocol: For this configuration we must choose LDAPS
-
Certificate: Select the RootCA certificate imported in the previous steps.
At this point you can click “OK”
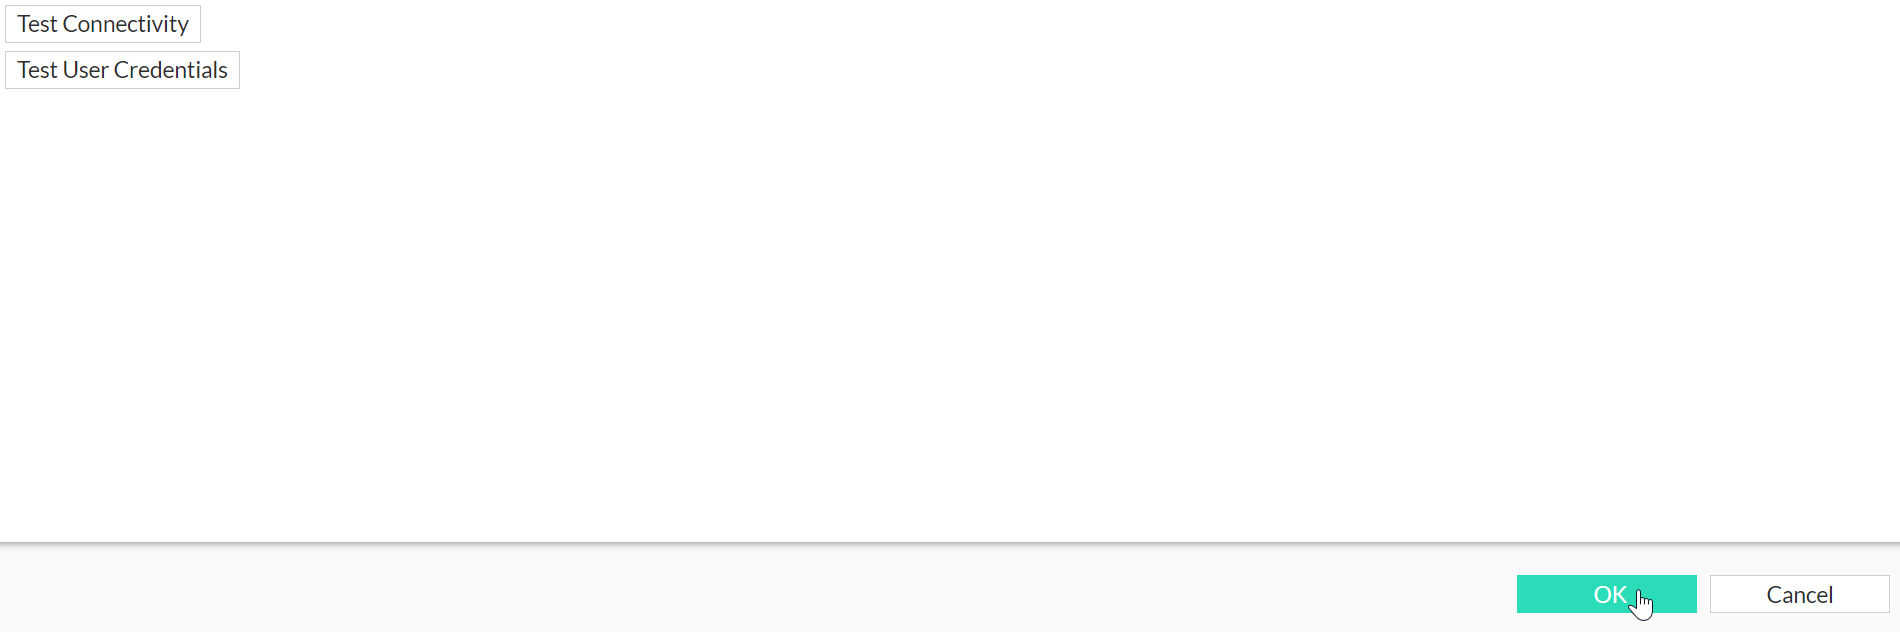
Figure 23: Click “OK” to confirm the configuration you have just performed
The approach taken so far has been carried out through the graphical interface, but the most interesting and advanced things, as often happens, can only be managed through the command-line interface, in this case the “FortiGate CLI Console”, reachable via the dedicated button at the top right, near the notification bell.
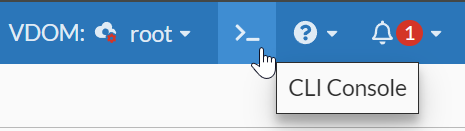
Figure 24: Opening the CLI Console
Once the console is open you can use, in sequence, the two commands, “config user ldap”:
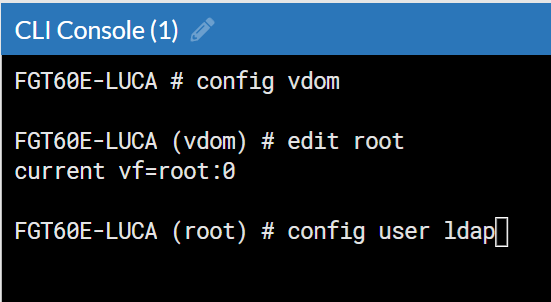
Figure 25: Using the config user ldap command
and “edit lab.local”
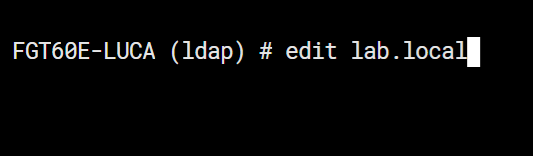
Figure 26: Using the edit command to select the desired ldap configuration
At this point you can use the “show full” command to display the entire configuration, including the additional settings you can set:
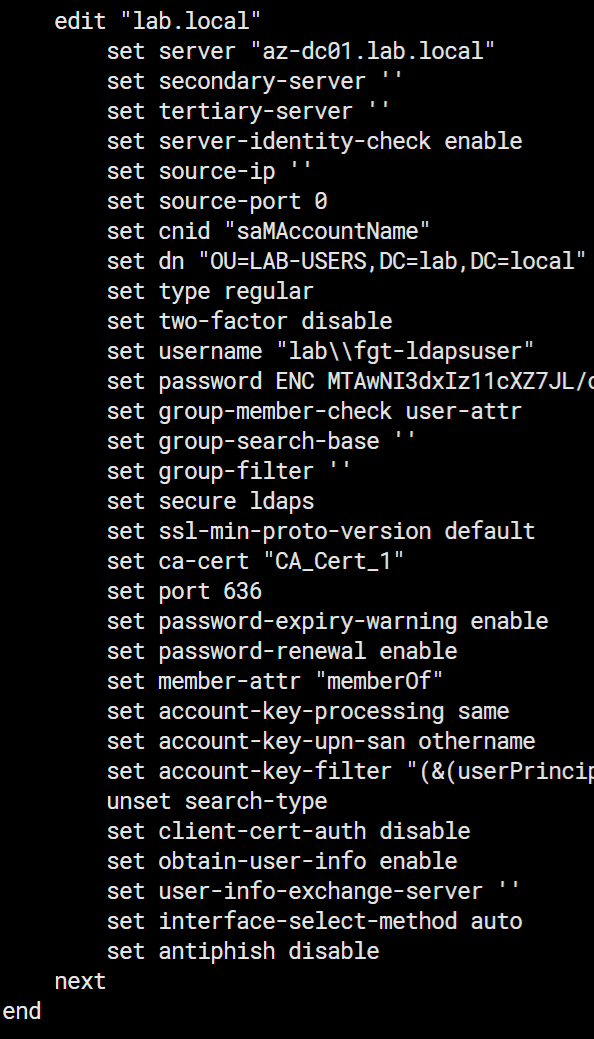
Figure 27: Full set of instructions shown after the “show full” command
The most interesting configurations you can add from the CLI are the following:
-
set secondary-server: Allows you to add the name or IP of a secondary Domain Controller.
-
set tertiary-server: Allows you to add the name or IP of a tertiary Domain Controller.
-
set password-expiry-warning: When set to “enable”, displays a warning if the user’s password has expired. This warning is shown, for example, during FortiClient authentication or when logging in to the SSL VPN Web.
-
set password-renewal: When set to “enable”, allows the password to be reset directly when logging in to the FortiGate. For example, you can reset the password during login via FortiClient or when logging in to the SSL VPN Web.
Configuring Users/Groups within the FortiGate
At this point you can add the users that can then be used within the FortiGate.
In the left-hand column open the “User & Authentication” tab, select “User Definition” and then click “Create New”:
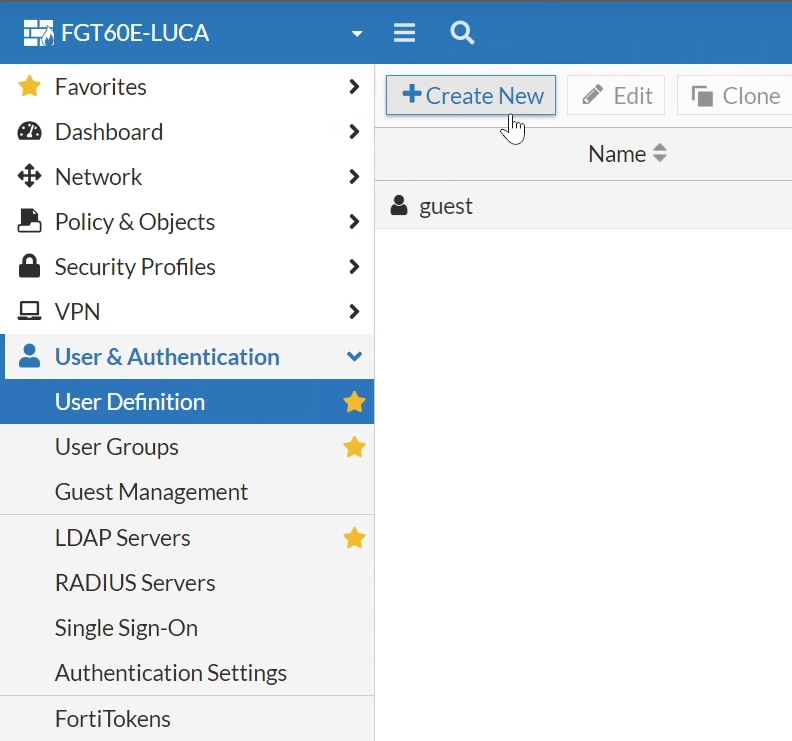
Figure 28: Importing Active Directory users via the FortiGate
In the wizard that opens select “Remote LDAP User” and then “Next”:
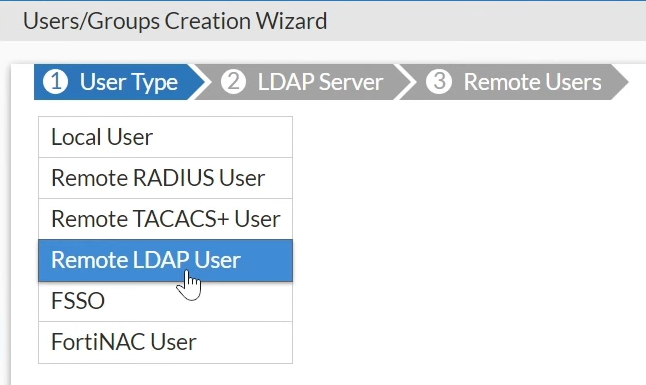
Figure 29: Selecting Remote LDAP User
Select the drop-down menu next to “LDAP Server” and select the “Name” of the LDAPS configuration performed in the previous sections:
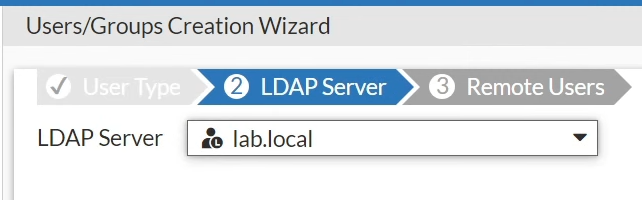
Figure 30: Selecting the correct LDAP Server
In the next screen the Active Directory tree added inside the FortiGate LDAPS configuration is presented. Using the “Search” bar you can search for users:
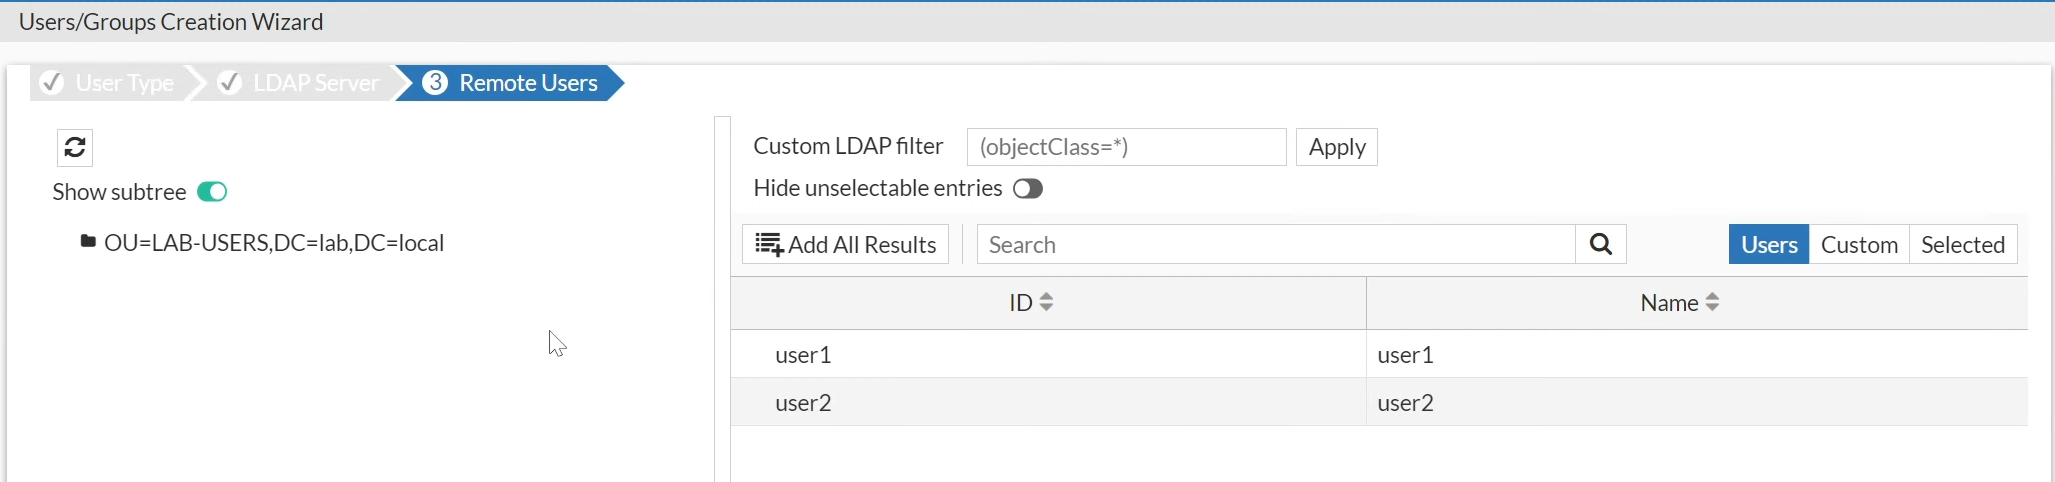
Figure 31: Using the “Search” tab you can run a search within the designated OU.
Once you have found the users you want to import you can select both and right-click on one of the names, then click “Add Selected”:
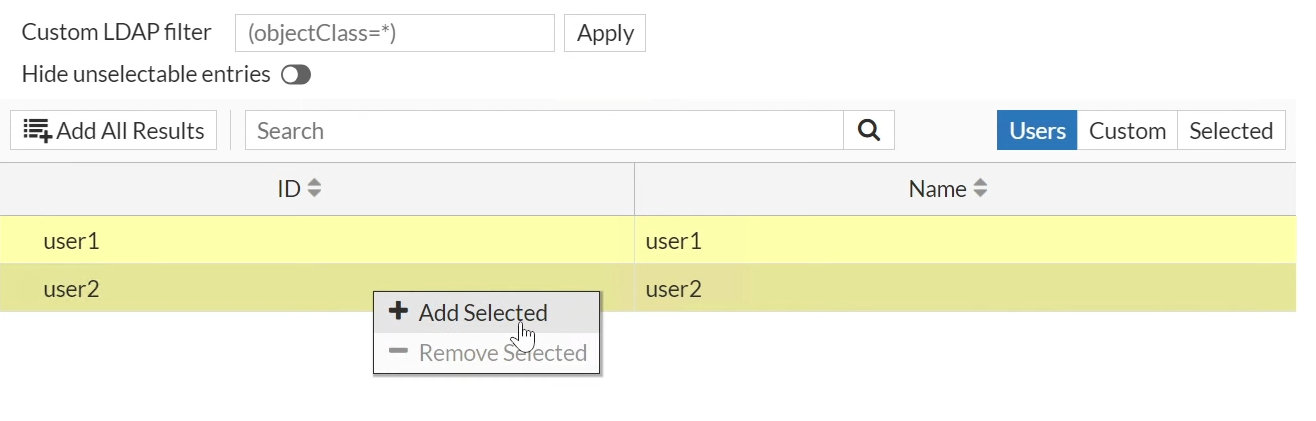
Figure 32: Adding users into the FortiGate by clicking “Add Selected”
Once correctly imported, a green check mark will appear next to the newly imported users, so you can confirm and complete the import process by clicking the “Submit” button at the bottom:
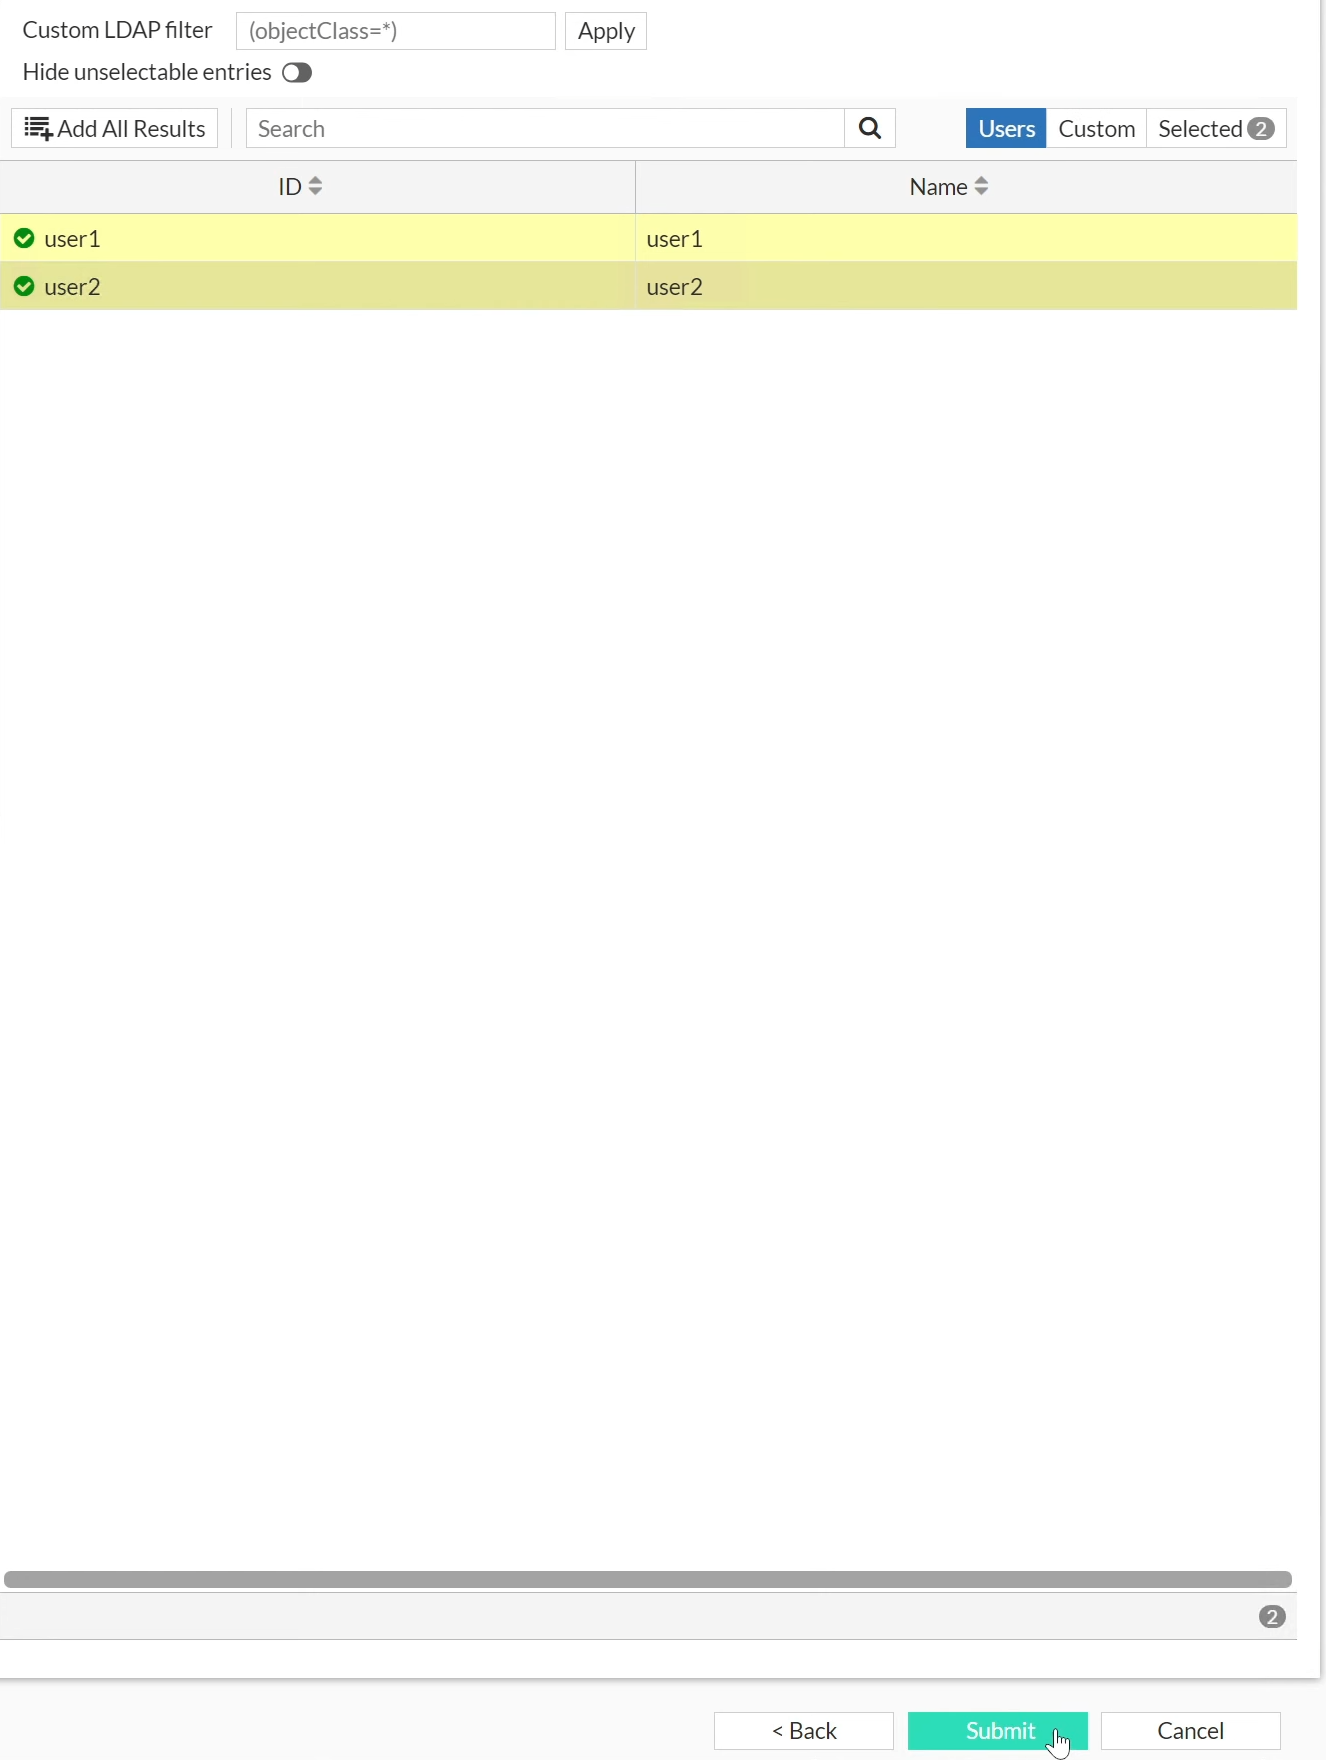
Figure 33: Click “Submit” to complete the user-adding process
When you are done you will find the newly added users under “User & Authentication”, then “User Definition”:
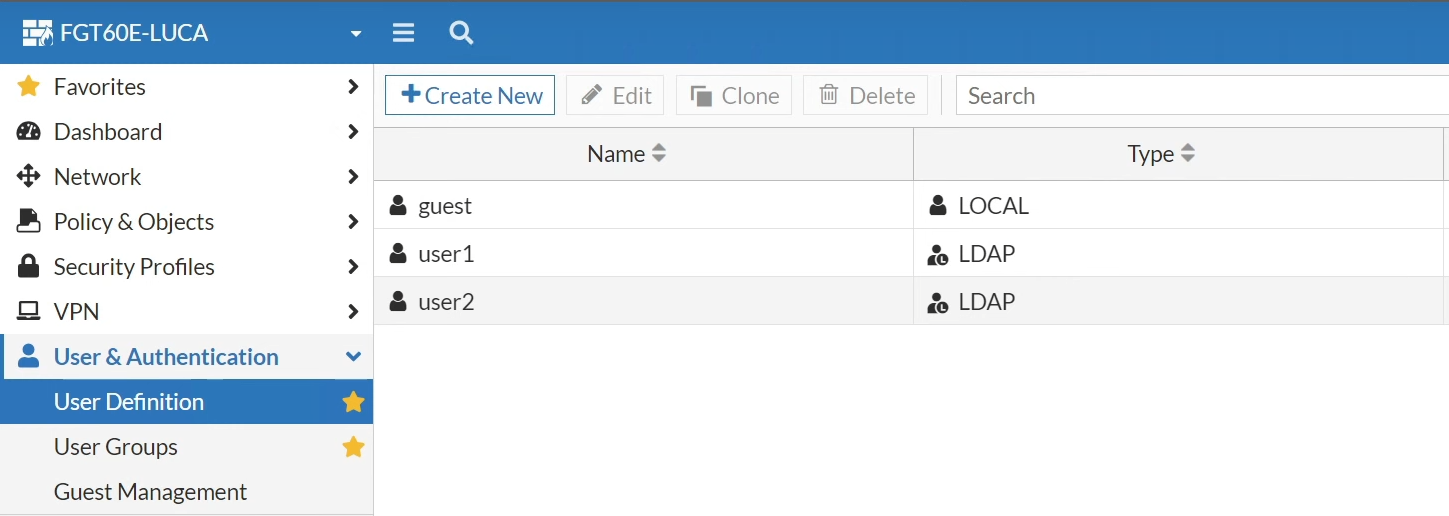
Figure 34: View of the newly added ldap users
The accounts are recognizable by the “Type” column, which reports the origin of the user.
Conclusions
In this guide we have seen how to integrate the FortiGate into our identity infrastructure using the LDAPS protocol. It is very important to always keep in mind a least-privilege implementation approach, always granting the minimum privilege and avoiding, as in this case, assigning roles such as “Domain Admin” to the user that runs LDAP queries.
You can find the official documentation for what we implemented at the following links:
https://docs.fortinet.com/document/FortiGate/7.4.2/administration-guide/401976/ldap-servers